Python PyQt Module
We offer you a brighter future with placement-ready courses - Start Now!!
Finding a way to build a GUI application? Then PyQt toolkit would be your choice.
We are going to learn about one of the widely used Python GUI interacting toolkits, namely, PyQt. In this article, we will introduce and then see the implementation part by discussing widgets.
What is Python PyQt Toolkit?
PyQt is a Python binding of Qt, a cross-platform and open-source GUI toolkit. Qt is a popular C++ framework used to develop GUI applications for desktop, mobile, and embedded platforms ( Linux, Windows, macOS, Android, iOS, Raspberry Pi, etc.).
PyQt is free software developed and maintained by Riverbank Computing. It implements over 600 classes and more than 6000 functions and methods.
PyQt Functionalities
It provides many functionalities including:
1. GUI widgets.
2. Parser for XML processing
3. QScintilla, a text editor widget based on Scintilla.
4. Support of SVG.
5. Classes to connect to SQL databases.
6. Classes for embedding ActiveX controls on Windows.
7. Networking
8. Web toolkits
Applications of PyQt
This toolkit is used by many major companies across all industries such as LG, Mercedes, AMD, Panasonic, Harman, etc. Other applications include:
1. Calibre: It is an e-book management application.
2. Dropbox: It is a file-hosting service app.
3. Eric: It is a Python IDE.
4. Leo: It is an outliner and literate programming editor.
5. Spyder: It is one of the Python IDEs.
6. OpenShot: It is a video-editing program.
7. Veusz: It is a scientific plotting application.
8. Orange: It is a data-mining and visualization framework.
9. Kodos: It is a debugger of regular-expressions
10. Anki: It is a spaced repetition flashcard program.
11. Ninja-IDE: It is an extensible open-source Python IDE.
12. qt-recordMyDesktop: It is Qt4 frontend for recordMyDesktop.
Modules in PyQT5
The PyQT5 version also consists of various modules that help the developer in building the GUIs and these are:
1. QGLContext
2. QGLFormat
3. QGLWidget
4. QtCore
5. QtGui
6. QtPrintSupport
7. QtQml
8. QtQtuick
9. QtWidget
10. QtWebKit
11. QtWebKitWidgets
12. GUI toolkitQtWidgets
Installing PyQt
Before we use this toolkit, we need to install it. We can do that by writing the below command in the command prompt.
pip install pyqt5
On running the statement, we get the below output.
Collecting pyqt5
  Downloading PyQt5-5.15.4-cp36.cp37.cp38.cp39-none-win_amd64.whl (6.8 MB)
     |████████████████████████████████| 6.8 MB 3.2 MB/s
Collecting PyQt5-Qt5>=5.15
  Downloading PyQt5_Qt5-5.15.2-py3-none-win_amd64.whl (50.1 MB)
     |████████████████████████████████| 50.1 MB 55 kB/s
Collecting PyQt5-sip<13,>=12.8
  Downloading PyQt5_sip-12.9.0-cp38-cp38-win_amd64.whl (63 kB)
     |████████████████████████████████| 63 kB 293 kB/s
Installing collected packages: PyQt5-Qt5, PyQt5-sip, pyqt5
Successfully installed PyQt5-Qt5-5.15.2 PyQt5-sip-12.9.0 pyqt5-5.15.4
Now we can use the toolkit by importing it by using the below statement.
import PyQt5
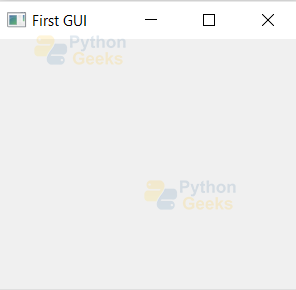
Creating an Empty GUI using PyQt
Let us start the implementation by creating an empty GUI using PyQt.
Example of creating an empty GUI:
import sys
from PyQt5.QtWidgets import QApplication, QWidget

app=QApplication(sys.argv)
wid=QWidget()
wid.resize(300,250)
wid.setWindowTitle('First GUI')
wid.show()
sys.exit(app.exec_())
Output:
In the code,
1. We import the required modules. The modules help in creating the GUI in the current namespace. The QtWidgets module contains all the major widgets.
2. Next, we create an instance of the QApplication class. This is like an entry point into the app and must be created for every GUI application. The sys.argv is the set of parameters passed to the class when calling it via the command line or while automating the interface.
Here, we are not passing any argument so, we can give the input as an empty list ([]) instead of sys.argv.
3. Next, we create an instance of the QWidget class. This is the base for all the UI objects we use for the GUI using Qt.
4. Then, we set the size and the title of the window.
5. Then we use the show() method to display the window.
6. The last statement lets us get into an infinite loop. The application runs till the user manually closes it.
Example of creating an empty GUI:
import sys
from PyQt5.QtWidgets import QApplication, QWidget
from PyQt5.QtGui import QIcon

class App(QWidget):
    def __init__(self):
        super().__init__()
        self.title='First GUI'
        self.left=10
        self.top=10
        self.width=300
        self.height=250
        self.initUI()
    def initUI(self):
        self.setWindowTitle(self.title)
        self.setGeometry(self.left,self.top,self.width,self.height)
        self.show()
if __name__=='__main__':
    app=QApplication(sys.argv)
    ex=App()
    sys.exit(app.exec_())
Output:
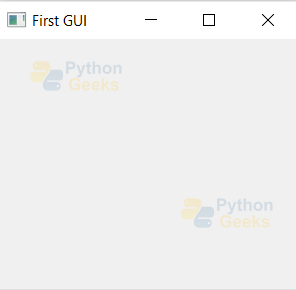
This uses the same code like the above one, except that we added the concept of classes. This is an efficient way as we don’t have to write code again and again if we want we can just instantiate it again, especially for the widgets. Here, we created a class for the window. And we pass all the attributes of the widow like title, width, etc. And then we create a function to initialize the window.
In the further sections, let us see different commonly used widgets in PyQt.
Status Bar
We can create a status bar that gives the current status of the app.
Example of creating status bar:
import sys
from PyQt5.QtWidgets import QApplication, QWidget,QMainWindow
from PyQt5.QtGui import QIcon

class App(QMainWindow):
    def __init__(self):
        super().__init__()
        self.title='Status Bar'
        self.left=10
        self.top=10
        self.width=300
        self.height=250
        self.initUI()
    def initUI(self):
        self.setWindowTitle(self.title)
        self.setGeometry(self.left,self.top,self.width,self.height)
        self.statusBar().showMessage('In progress') #Adding a Status Bar
        self.show()
if __name__=='__main__':
    app=QApplication(sys.argv)
    ex=App()
    sys.exit(app.exec_())
Output:
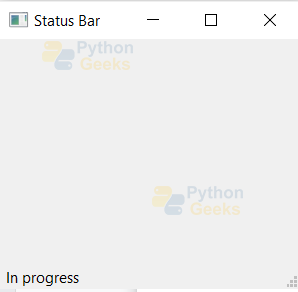
The above code is similar to the previous example. Except that we are importing another class named ‘QMainWindow’ that handles the status bar. And then we added a statement to show the status by printing the message.
Buttons
For adding the buttons to the GUI, we use the QPushButtons class.
Example of creating button:
import sys
from PyQt5.QtWidgets import QApplication, QWidget,QPushButton
from PyQt5.QtGui import QIcon

class App(QWidget):
    def __init__(self):
        super().__init__()
        self.title='Button Widget'
        self.left=10
        self.top=10
        self.width=300
        self.height=250
        self.initUI()
    def initUI(self):
        self.setWindowTitle(self.title)
        self.setGeometry(self.left,self.top,self.width,self.height)
        button=QPushButton('Click',self) #creating a instance of QPushButton class
        button.setToolTip('This is a button') #Adding the tool tip text for the button object created
        button.move(100,125) #Setting the location of the button
        self.show()
if __name__=='__main__':
    app=QApplication(sys.argv)
    ex=App()
    sys.exit(app.exec_())
Output:
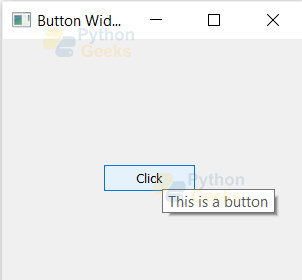
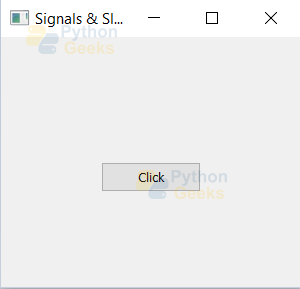
In this example, we created a button using the QPushButton class. We set the test on the button as ‘Click’. Then we set the tooltip text and the location of the button.
PyQt Signals and Slots
When an event occurs like a button click, user input, etc., then the widget sends signals. We can set an action to occur when a particular event occurs. The event here is the signal and the corresponding action is the slot.
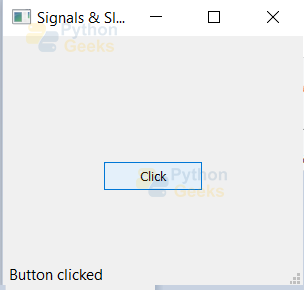
Let us see an example where the status bar message is shown on clicking a button.
Example of signals and slots:
import sys
from PyQt5.QtWidgets import *

class App(QMainWindow):
    def slot_func(self): # function that runs on button click
        self.statusBar().showMessage('Button clicked') #Adding a Status Bar
    def __init__(self):
        super().__init__()
        self.title='Signals & Slots'
        self.left=10
        self.top=10
        self.width=300
        self.height=250
        self.initUI()
    def initUI(self):
        self.setWindowTitle(self.title)
        self.setGeometry(self.left,self.top,self.width,self.height)
        button=QPushButton('Click',self) #creating a instance of QPushButton class
        button.clicked.connect(self.slot_func) #adding an action on button click
        button.move(100,125) #Setting the location of the button
        self.show()
if __name__=='__main__':
    app=QApplication(sys.argv)
    ex=App()
    sys.exit(app.exec_())
Output:
Message Boxes
These are the pop-up boxes that we see sometimes.
Example of message boxes:
import sys
from PyQt5.QtWidgets import QApplication,QWidget,QPushButton,QMessageBox
from PyQt5.QtCore import pyqtSlot
from PyQt5.QtGui import QIcon

class App(QWidget):
    def __init__(self):
        super().__init__()
        self.title='Message Box'
        self.left=10
        self.top=10
        self.width=300
        self.height=250
        self.initUI()
    def initUI(self):
        self.setWindowTitle(self.title)
        self.setGeometry(self.left,self.top,self.width,self.height)
        buttonReply=QMessageBox.question(self, 'Hello', "Hope you are fine!", QMessageBox.Yes | QMessageBox.No, QMessageBox.Yes)
        if buttonReply==QMessageBox.Yes:print("Fine")
        else: print("NotGood")
        self.show()
if __name__=='__main__':
    app=QApplication(sys.argv)
    ex=App()
    sys.exit(app.exec_())
Output:
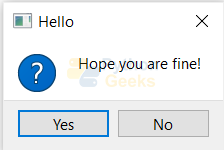
In this example, we created a message box named ‘Hello’ and that asks if the user is fine. It has two options to choose from, ‘Yes’ and ‘No’. By default, the option ‘Yes’ is selected. This is because the third argument of the instance is ‘QMessageBox.Yes’. Now if we click Yes, then ‘Fine’ will be printed on the console. Else, ‘NotGood’ will be printed.
TextBox
The text boxes are mainly used to take input from the user. We can use setText() and getText() methods from the QLineEdit class.
Example of the text box:
import sys
from PyQt5.QtWidgets import QMainWindow,QApplication,QWidget,QPushButton,QAction,QLineEdit,QMessageBox
from PyQt5.QtCore import pyqtSlot
from PyQt5.QtGui import QIcon

class App(QWidget):
    def __init__(self):
        super().__init__()
        self.title='Text Box'
        self.left=10
        self.top=10
        self.width=300
        self.height=250
        self.initUI()
    def initUI(self):
        self.setWindowTitle(self.title)
        self.setGeometry(self.left,self.top,self.width,self.height)
        self.textbox=QLineEdit(self)
        self.textbox.move(50,50)
        self.textbox.resize(180,40)
        self.button=QPushButton('Click',self)
        self.button.move(100,100)
        self.button.clicked.connect(self.click_func)
        self.show()
    def click_func(self):
        textboxValue=self.textbox.text()
        QMessageBox.question(self, 'Welcome','Hello!'+textboxValue, QMessageBox.Ok, QMessageBox.Ok)
        self.textbox.setText("")
if __name__=='__main__':
    app=QApplication(sys.argv)
    ex=App()
    sys.exit(app.exec_())
Output:
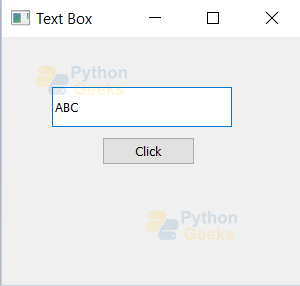
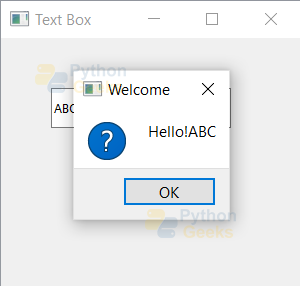
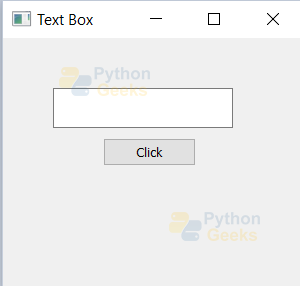
Here, we created a text box. And we also created a button that pops up a message box greeting the person, whose name is entered in the text box.
Menu
We can add menus to the application using the QMainWindow class.
Example of the menu:
import sys
from PyQt5.QtWidgets import QMainWindow,QApplication,QWidget,QPushButton,QAction,QLineEdit,QMessageBox
from PyQt5.QtCore import pyqtSlot
from PyQt5.QtGui import QIcon

class App(QMainWindow):
    def __init__(self):
        super().__init__()
        self.title='Menu'
        self.left=10
        self.top=10
        self.width=300
        self.height=250
        self.initUI()
    def initUI(self):
        self.setWindowTitle(self.title)
        self.setGeometry(self.left,self.top,self.width,self.height)
        main_menu=self.menuBar()
        file_menu=main_menu.addMenu('File')
        home_menu=main_menu.addMenu('Home')
        help_menu=main_menu.addMenu('Help')
        exitButton=QAction(QIcon('exit24.png'), 'Exit', self)
        exitButton.setShortcut('Ctrl+Q')
        exitButton.setStatusTip('Exit application')
        exitButton.triggered.connect(self.close)
        file_menu.addAction(exitButton)
        self.show()
if __name__=='__main__':
    app=QApplication(sys.argv)
    ex=App()
    sys.exit(app.exec_())
Output:
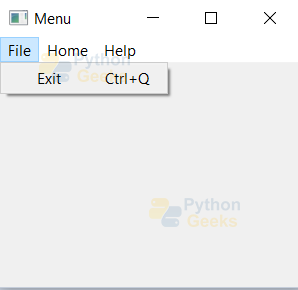
In this example, we created a menu with three options, namely, file, home, and help. Under the file, we added another option ‘Exit’, and also set the action to it.
Input Dialog Box
The input dialog box is available in the QWidget module.
Example of the input dialog box:
import sys
from PyQt5.QtWidgets import QApplication,QWidget,QInputDialog,QLineEdit
from PyQt5.QtGui import QIcon

class App(QWidget):
    def __init__(self):
        super().__init__()
        self.title='Input Dialog'
        self.left=10
        self.top=10
        self.width=300
        self.height=250
        self.initUI()
    def initUI(self):
        self.setWindowTitle(self.title)
        self.setGeometry(self.left,self.top,self.width,self.height)
        ip,ok_press=QInputDialog.getDouble(self,'Get Integer','Value',1,1,10,10)
        if ok_press:
               print(ip)
        self.show()
if __name__=='__main__':
    app=QApplication(sys.argv)
    ex=App()
    sys.exit(app.exec_())
Output:
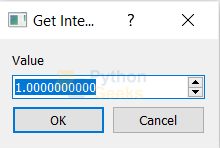
In this example, we are taking input from the user in the range 1 to 10.
Loading images
We can also show the images on the GUI by using the location of the image.
Example of image:
import sys
from PyQt5.QtWidgets import QApplication,QWidget,QLabel
from PyQt5.QtGui import QIcon,QPixmap

class App(QWidget):
    def __init__(self):
        super().__init__()
        self.title='Image'
        self.left=10
        self.top=10
        self.width=300
        self.height=250
        self.initUI()
    def initUI(self):
        self.setWindowTitle(self.title)
        self.setGeometry(self.left,self.top,self.width,self.height)
        label=QLabel(self)
        pixmap=QPixmap('D:\\pic.png')
        label.setPixmap(pixmap)
        self.resize(pixmap.width(),pixmap.height())
        self.show()
if __name__=='__main__':
    app=QApplication(sys.argv)
    ex=App()
    sys.exit(app.exec_())
Color Dialogs
We can also add a color dialog that allows us to choose a color.
Example of color dialog:
import sys
from PyQt5.QtWidgets import QApplication, QWidget, QPushButton, QColorDialog
from PyQt5.QtGui import QIcon
from PyQt5.QtCore import pyqtSlot
from PyQt5.QtGui import QColor

def color_dialog(self): #
    clr=QColorDialog.getColor()
    if clr.isValid():
          print(clr.name())

class App(QWidget):
    def __init__(self):
        super().__init__()
        self.title='Color Dialog'
        self.left=10
        self.top=10
        self.width=300
        self.height=250
        self.initUI()
    def initUI(self):
        self.setWindowTitle(self.title)
        self.setGeometry(self.left,self.top,self.width,self.height)
        button=QPushButton('Color dialog', self)
        button.setToolTip('This opens a color dialog')
        button.move(150,100)
        button.clicked.connect(self.button_click)
        self.show()
    @pyqtSlot()
    def button_click(self):
        color_dialog(self)

if __name__=='__main__':
    app=QApplication(sys.argv)
    ex=App()
    sys.exit(app.exec_())
Output:
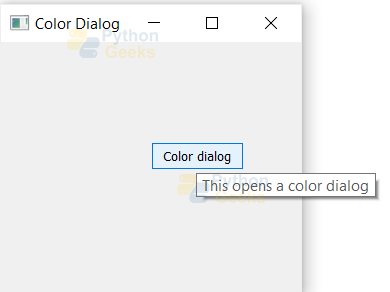
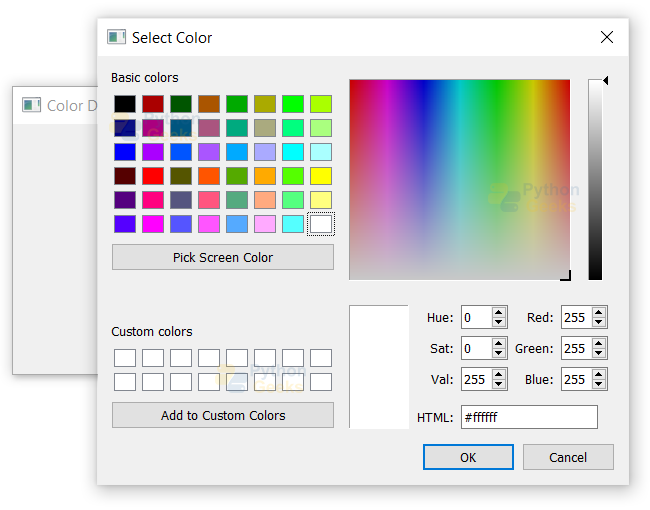
In the above code, we created a button to open the color dialog. On clicking this button, it calls the button_click() function. Inside this, there is a call to another function named color_dialog() that opens the color dialog.
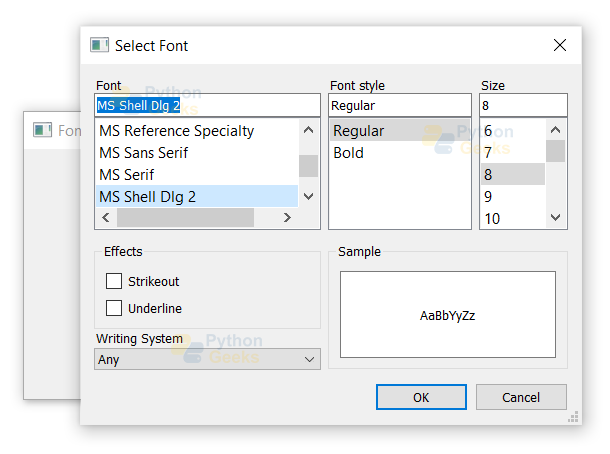
FontDialog
Similar to the color dialog, there is a font dialog that allows us to pick the font of our choice.
Example of font dialog:
import sys
from PyQt5.QtWidgets import QApplication, QWidget, QPushButton, QFontDialog
from PyQt5.QtGui import QIcon
from PyQt5.QtCore import pyqtSlot
from PyQt5.QtGui import QColor

def font_dialog(self):
    fnt=QFontDialog.getFont()
    if ok:
          print(fnt.toString())

class App(QWidget):
    def __init__(self):
        super().__init__()
        self.title='Font Dialog'
        self.left=10
        self.top=10
        self.width=300
        self.height=250
        self.initUI()
    def initUI(self):
        self.setWindowTitle(self.title)
        self.setGeometry(self.left,self.top,self.width,self.height)
        button=QPushButton('Font dialog', self)
        button.setToolTip('This opens a font dialog')
        button.move(150,100)
        button.clicked.connect(self.button_click)
        self.show()
    @pyqtSlot()
    def button_click(self):
        font_dialog(self)

if __name__=='__main__':
    app=QApplication(sys.argv)
    ex=App()
    sys.exit(app.exec_())
Output:

Layouts
We have seen move() and resize() methods in the above examples to set the position of a widget. We can also use layouts to position the layouts. These layouts are of two types:
1. QBoxLayout:
This is used to align the child widgets of the layout in either horizontal or vertical rows. Based on this, there are two ways that we can inherit from QBoxLayout are:
A. QHBoxLayout: This is used to line the child widgets horizontally.
B. QVBoxLayout: This is used to line the child widgets vertically.
2. QGridLayout:
This is used to create interfaces where the widgets are put out in the form of a grid (a matrix or 2D array). We can use the matrix representation to define the number of rows and columns in the grid. And then we can specify the position of the widgets as the indexes of the matrix.
Interview Questions on Python PyQT
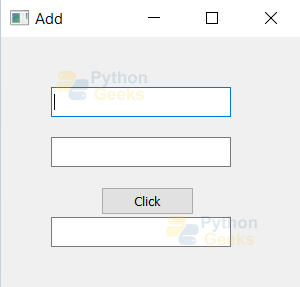
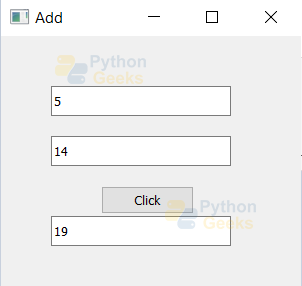
1. Write a program to print the sum of the two numbers entered by the user.
Ans. Below is the example
import sys
from PyQt5.QtWidgets import QMainWindow,QApplication,QWidget,QPushButton,QAction,QLineEdit,QMessageBox
from PyQt5.QtCore import pyqtSlot
from PyQt5.QtGui import QIcon

class App(QWidget):
    def __init__(self):
        super().__init__()
        self.title='Add'
        self.left=10
        self.top=10
        self.width=300
        self.height=250
        self.initUI()
    def initUI(self):
        self.setWindowTitle(self.title)
        self.setGeometry(self.left,self.top,self.width,self.height)
        self.textbox1=QLineEdit(self)
        self.textbox1.move(50,50)
        self.textbox1.resize(180,30)
        self.textbox2=QLineEdit(self)
        self.textbox2.move(50,100)
        self.textbox2.resize(180,30)
        self.button=QPushButton('Click',self)
        self.button.move(100,150)
        self.textbox3=QLineEdit(self)
        self.textbox3.move(50,180)
        self.textbox3.resize(180,30)
        self.button.clicked.connect(self.click_func)
        self.show()
    def click_func(self):
        n1=int(self.textbox1.text())
        n2=int(self.textbox2.text())
        self.textbox3.setText(str(n1+n2))
if __name__=='__main__':
    app=QApplication(sys.argv)
    ex=App()
    sys.exit(app.exec_())
Output:
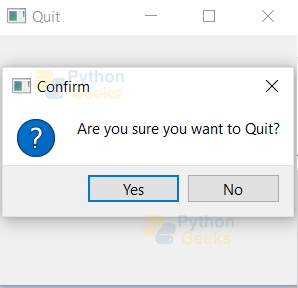
2. Write a program to show a message box to confirm on clicking the ‘quit’ button.
Ans. Below is the example
import sys
from PyQt5.QtWidgets import QMainWindow,QApplication,QWidget,QPushButton,QAction,QLineEdit,QMessageBox
from PyQt5.QtCore import pyqtSlot
from PyQt5.QtGui import QIcon

class App(QWidget):
    def __init__(self):
        super().__init__()
        self.title='Quit'
        self.left=10
        self.top=10
        self.width=300
        self.height=250
        self.initUI()
    def initUI(self):
        self.setWindowTitle(self.title)
        self.setGeometry(self.left,self.top,self.width,self.height)
        self.button=QPushButton('Quit',self)
        self.button.move(100,100)
        self.button.clicked.connect(self.click_func)
        self.show()
    def click_func(self):
        QMessageBox.question(self, 'Confirm','Are you sure you want to Quit?', QMessageBox.Yes | QMessageBox.No, QMessageBox.Yes)
if __name__=='__main__':
    app=QApplication(sys.argv)
    ex=App()
    sys.exit(app.exec_())
Output:

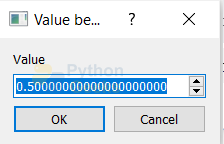
3. Write a program to take input of numbers from the list [1,1.5,2.2.5,….10].
Ans. Below is the example
import sys
from PyQt5.QtWidgets import QApplication,QWidget,QInputDialog,QLineEdit
from PyQt5.QtGui import QIcon

class App(QWidget):
    def __init__(self):
        super().__init__()
        self.title='Choose a value'
        self.left=10
        self.top=10
        self.width=300
        self.height=250
        self.initUI()
    def initUI(self):
        self.setWindowTitle(self.title)
        self.setGeometry(self.left,self.top,self.width,self.height)
        ip,ok_press=QInputDialog.getDouble(self,'Value between 1 and 10','Value',0.5,0.5,10,20)
        self.show()
if __name__=='__main__':
    app=QApplication(sys.argv)
    ex=App()
    sys.exit(app.exec_())
Output:
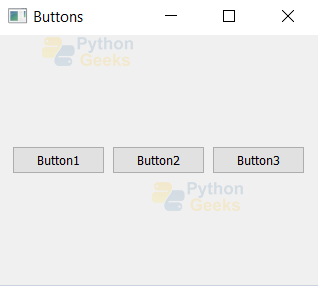
4. Write a program to align three buttons horizontally.
Ans. Below is the example
import sys
from PyQt5.QtWidgets import *

class App(QWidget):
    def __init__(self):
        super().__init__()
        self.title='Buttons'
        self.left=10
        self.top=10
        self.width=300
        self.height=250
        self.initUI()
    def initUI(self):
        self.setWindowTitle(self.title)
        self.setGeometry(self.left,self.top,self.width,self.height)
        button1 = QPushButton("Button1")
        button2 = QPushButton("Button2")
        button3 = QPushButton("Button3")

        hbox = QHBoxLayout(self)

        hbox.addWidget(button1)
        hbox.addWidget(button2)
        hbox.addWidget(button3)

        self.show()
if __name__=='__main__':
    app=QApplication(sys.argv)
    ex=App()
    sys.exit(app.exec_())
Output:
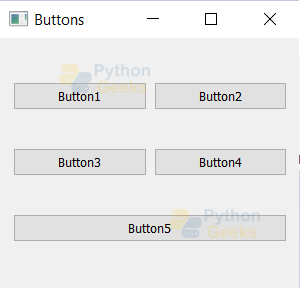
5. Write a program to create a grid with two buttons horizontally aligned and the third button in the second row covering the entire row.
Ans. Below is the example
import sys
from PyQt5.QtWidgets import *

class App(QWidget):
    def __init__(self):
        super().__init__()
        self.title='Buttons'
        self.left=10
        self.top=10
        self.width=300
        self.height=250
        self.initUI()
    def initUI(self):
        self.setWindowTitle(self.title)
        self.setGeometry(self.left,self.top,self.width,self.height)
        grid = QGridLayout(self)
        grid.addWidget(QPushButton("Button1"),0,0)
        grid.addWidget(QPushButton("Button2"),0,1)
        grid.addWidget(QPushButton("Button3"),1,0)
        grid.addWidget(QPushButton("Button4"),1,1)
        grid.addWidget(QPushButton("Button5"),2,0,1,0)

        self.show()
if __name__=='__main__':
    app=QApplication(sys.argv)
    ex=App()
    sys.exit(app.exec_())
Output:
Quiz on Python PyQt
Conclusion
In this article, we got introduced to the PyQt toolkit. We also saw the implementation with some of the major widgets. After this, we saw about layouts and practiced some coding questions.
Hope all the concepts covered are clearly understood by you. Happy learning!
