Live Weather Notifications using Python
Get Ready for Your Dream Job: Click, Learn, Succeed, Start Now!
We all check for weather updates, especially when we want to go outside. Wouldn’t it be more comfortable to get the notifications rather than checking them ourselves? Yes! We will be building a Python project that sends live weather reports as desktop notifications.
What is a Live Weather Desktop Notification Project?
This weather desktop notification project sends the live weather report of the location that you enter as a desktop notification. The information sent includes temperature, pressure, humidity, and description if any.
Live Weather Desktop Notification Project using Python
We will be building this project using the modules Tkinter, time, requests, and plyer. We build the GUI to take the input of location using the Tkinter module. Also, we use the requests module to extract the weather information from a website. The time and plyer modules are used to send the notification and let it pop up for a certain amount of time.
Download Live Weather Desktop Notification Project
Please download the source code for the live weather desktop notification project using the link: Live Weather Desktop Notification Project
Prerequisites for Python Weather Alert Project
It is advised that the user has prior knowledge of python, Tkinter, and a basic understanding of JSON format. The time module is a standard python module. And the following commands can be used to download the other modules.
pip install tkinter
pip install requests
pip install plyer
Project Structure
We will follow the below steps to build python weather alert project.
1. Importing modules
2. Creating a GUI and adding required components
3. Writing a function to get notification
Simple steps right? Now, let’s dive into the coding part.
1. Importing modules
#importing modules
import time
from tkinter import *
from tkinter import messagebox as mb
import requests
from plyer import notification
Code explanation:
a. In this step, we import the above discussed 4 modules
b. The message box helps in showing pop up message in case any error occurred
2. Creating a GUI and adding required components
Now, we create an empty window. Then we create the label, entry and button for taking the input of the location and sending notification.
#creating the window
wn = Tk()
wn.title("PythonGeeks Weather Alert")
wn.geometry('700x200')
wn.config(bg='azure')

# Heading label
Label(wn, text="PythonGeeks Weather Desktop Notifier", font=('Courier', 15), fg='grey19',bg='azure').place(x=100,y=15)

#Getting the city name
Label(wn, text='Enter the Location:', font=("Courier", 13),bg='azure').place(relx=0.05, rely=0.3)

place = StringVar(wn)
place_entry = Entry(wn, width=50, textvariable=place)
place_entry.place(relx=0.5, rely=0.3)

#Button to get notification
btn = Button(wn, text='Get Notification', font=7, fg='grey19',command=getNotification).place(relx=0.4, rely=0.75)
#run the window till the closed by user
wn.mainloop()
Code explanation:
a. title(): It displays the title on the top of the GUI.
b. config(): It sets the background color of the window
c. geometry(): It sets the length and width of the GUI.
d. Label(): This helps in showing text on the window
e. Entry(): This widget helps in taking input from the user
f. Button(): This creates a button with mentioned attributes and the command parameter represents the function that executed on pressing the button
g. mainloop(): This makes sure the screen runs till it is manually closed
3. Writing a function to get notification
Finally, we store the input of the place in a variable and generate a corresponding link to get the information about weather conditions at that location. Then, we get the json object and get the required details like temperature, pressure, humidity, and description. At last, we show this information in the form of a notification.
#Function to get notification of weather report
def getNotification():
    cityName=place.get() #getting input of name of the place from user
    baseUrl = "http://api.openweathermap.org/data/2.5/weather?" #base url from where we extract weather report
    try:
        # This is the complete url to get weather conditions of a city
        url = baseUrl + "appid=" + 'd850f7f52bf19300a9eb4b0aa6b80f0d' + "&q=" + cityName
        response = requests.get(complete_url) #requesting for the the content of the url
        x = response.json() #converting it into json
        y = x["main"] #getting the "main" key from the json object

        # getting the "temp" key of y
        temp = y["temp"]
        temp-=273 #converting temperature from kelvin to celsius

        # storing the value of the "pressure" key of y
        pres = y["pressure"]

        # getting the value of the "humidity" key of y
        hum = y["humidity"]

        # storing the value of "weather" key in variable z
        z = x["weather"]

        # getting the corresponding "description"
        weather_desc = z[0]["description"]

        # combining the above values as a string
        info="Here is the eather description of "+ cityName+ ":"+" \nTemperature = " +str(temp) +"°C"+"\n atmospheric pressure = " + str(pres) + "hPa"+"\n humidity = " +str(hum) +"%"+"\n description of the weather= " + str(weather_desc)

        #showing the notification
        notification.notify(
                    title = "YOUR WEATHER REPORT",
                    message=info ,

                    # displaying time
                    timeout=2)
        # waiting time
        time.sleep(7)

    except Exception as e:
        mb.showerror('Error',e)#show pop up message if any error occurred
Code explanation:
a. get(): It helps in getting the input given by the user in the Entry() widget
b. requests.get(): Getting the data from the url
c. .json(): converting data to .json format
d. notification.notify(): showing the notification on desktop
e. showerror(): Shows error pop up message on occurrence of exception
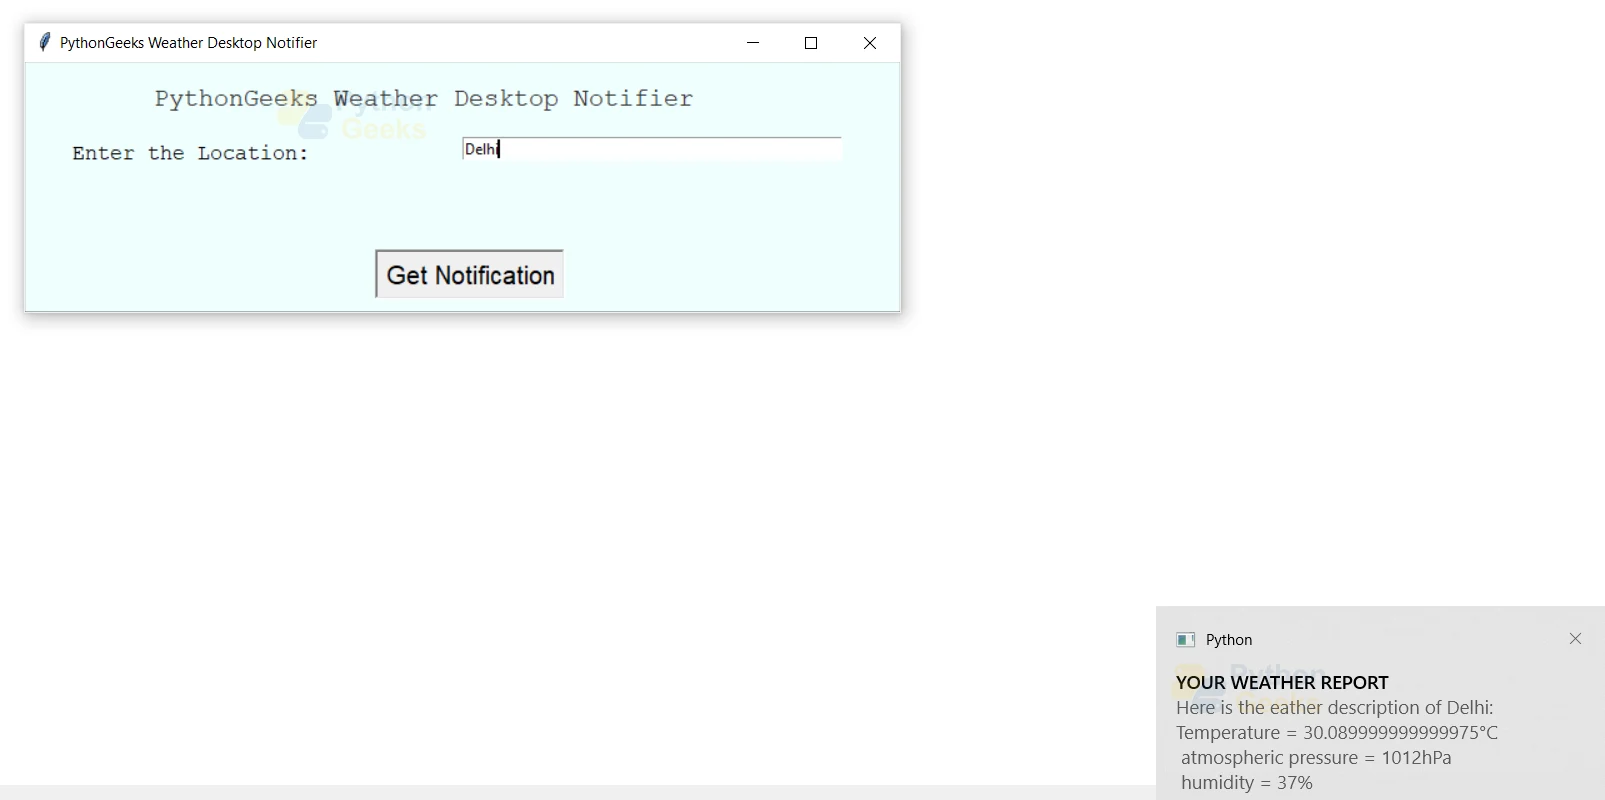
Output of Python Live Weather Desktop Notification Project
Image of the desktop notification
Summary
Hurray! We have successfully built the live weather desktop alert project using Python. We learned to build GUI, extract information from urls and send notifications. Hope you found it useful!

Hey!.what should I do??
A small doubt
When iam trying it, it is asking a url
in getnotification function use url instead of url_complete that why its shows error message after enter any location
I have run these codes using pycharm but got the following error codes. Is there any solutions to solve this problem?
Traceback (most recent call last):
File “C:\Users\Zakia Sultana\PycharmProjects\Testproject\Weather.py”, line 5, in
import requests
ModuleNotFoundError: No module named ‘requests’
Process finished with exit code 1
u need to install the modules from pypi.org
i mean install the modules in the terminal** first, pip install requests
I’m getting error in this part -> except Exception as e:
can you please help me solve it
amzing
can any one fight with with me