Python Currency Converter Project with GUI
We offer you a brighter future with placement-ready courses - Start Now!!
A currency converter stores the foremost recent market valuations of the world’s currencies, which allows people to check the value of one currency against those of others currencies. Here we are going to develop Currency Converter project in Python.
About Currency Converter Project in Python:
Python Currency Converter Project is easy-to-use for the currency conversion who are dealing with multiple currencies.
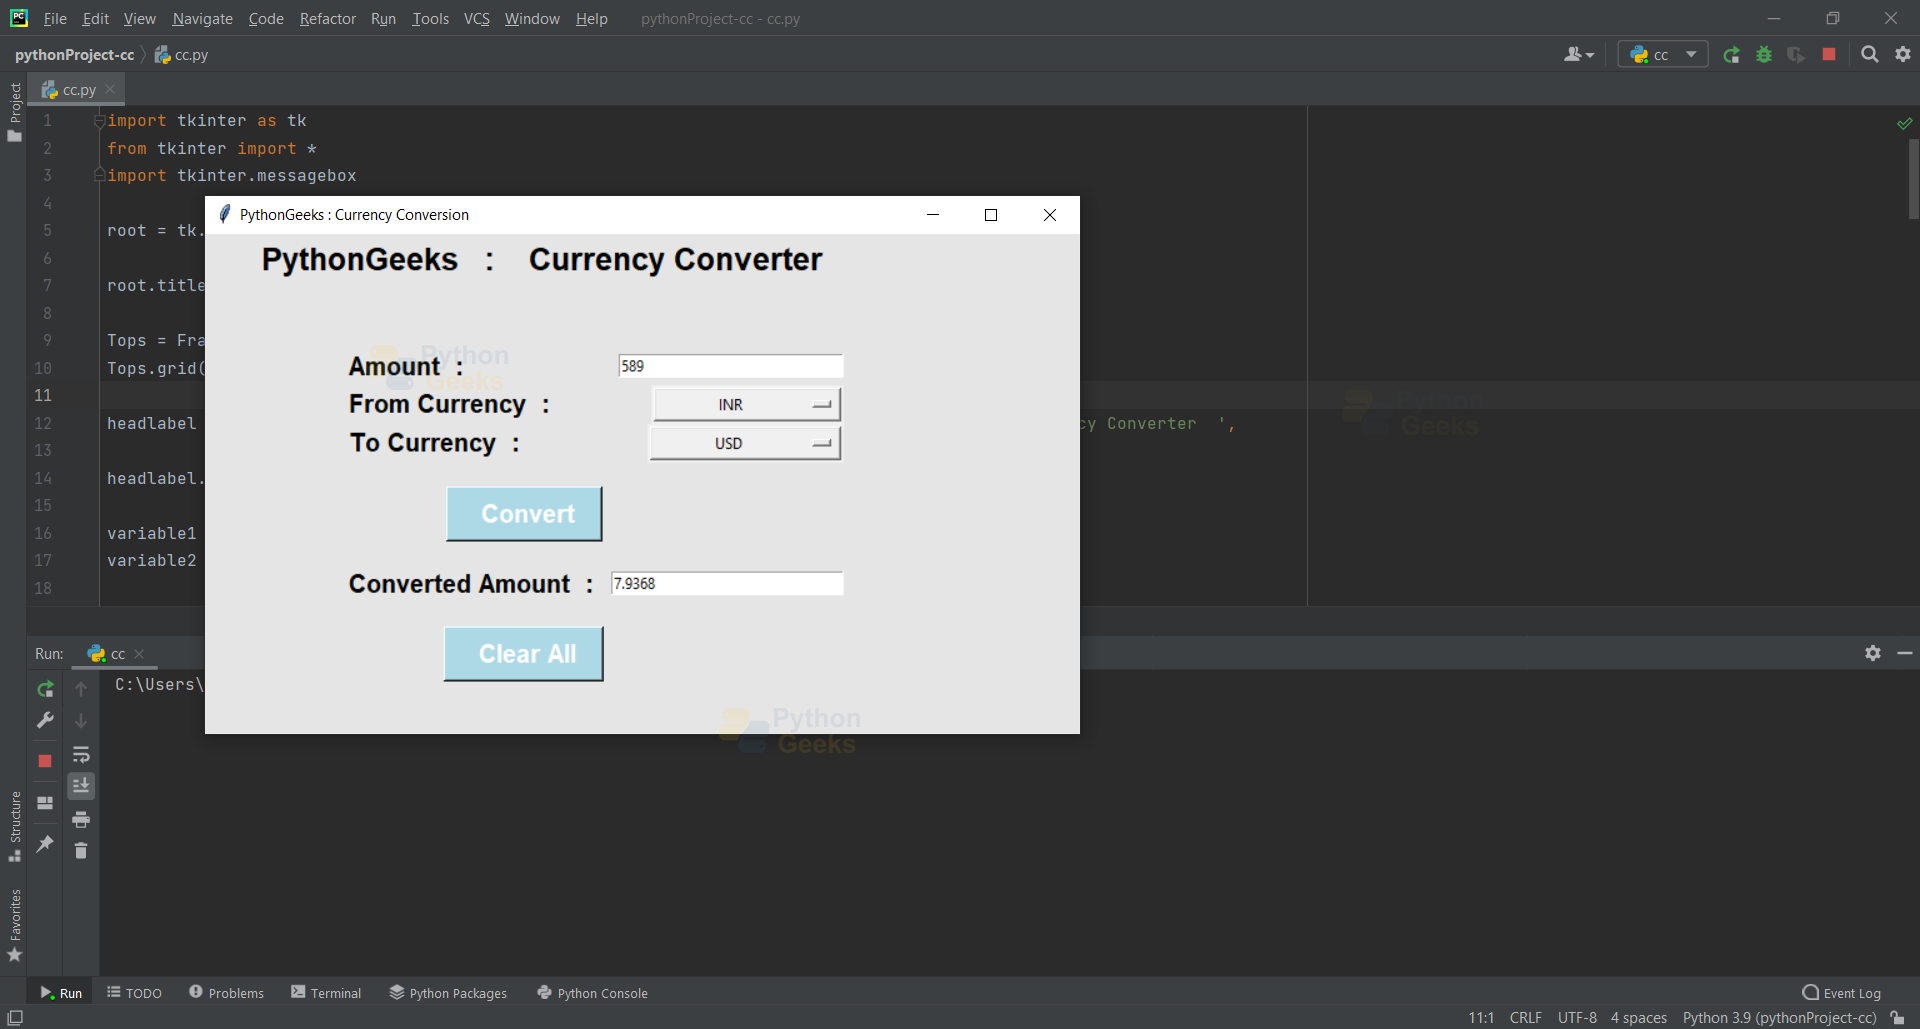
Enter the amount and select the from currency and to currency and click convert. The converted amount will be displayed.
Project Prerequisites
The currency converter project in python requires you to have basic knowledge of python programming and the Tkinter library.
- tkinter — For User Interface (UI)
- forex_python–This module provides the most direct way of getting the currency conversion rates.
Download Currency Converter Project Code
Please download the source code of python currency converter: Python Currency Converter Project Code
Steps to Build the Python Project on Currency Converter
- Import the necessary Libraries
- Creating a GUI window
- Currency Converter Class
- UI for Currency Converter
- Main Function
1. Import the Libraries
Tkinter-It is the inbuilt python module that is used to create GUI applications. To install Tkinter, go to command prompt and type pip install tkinter
import tkinter as tk
from tkinter import *
import tkinter.messagebox
2. Creating a GUI Window and Heading for it:
- root=tk.Tk () This line of code automatically creates a GUI window with a title bar, close button
- We can change the title using title of root window using root.title(” “)
- grid()-The Grid geometry manager puts the widgets in a 2-dimensional table.
- Label()-It is used to provide boxes where you can place text or images.
root = tk.Tk()
# Create the Window for Python Currency Converter
root.title("PythonGeeks : Python Currency Conversion")
Tops = Frame(root, bg='#e6e5e5', pady=2, width=1850, height=100, relief="ridge")
Tops.grid(row=0, column=0)
headlabel = tk.Label(Tops, font=('lato black', 19, 'bold'), text='      PythonGeeks   :    Currency Converter
'bg='#e6e5e5', fg='black')
headlabel.grid(row=1, column=0, sticky=W)
3. Currency Converter Class:
- Create Global Variables and initialize the variables.
- Defining a Function to perform real-time conversion from one currency to another currency.
- Importing forex_python module for getting current conversion rates.
- get() – Returns the entry’s current text as a string.
- If the amount field is empty. it shows an error !!
- If we didn’t select the from_currency and to_currency, it shows an error!!
- Converting the amount from string to float.
- It will convert and insert the new amount in amount2_field and return it.
- If we want to clear the entered values, we use the clear_all() function.
variable1 = tk.StringVar(root)
variable2 = tk.StringVar(root)

variable1.set("currency")
variable2.set("currency")


def RealTimeCurrencyConversion():
    from forex_python.converter import CurrencyRates
    c = CurrencyRates()

    from_currency = variable1.get()
    to_currency = variable2.get()

    if (Amount1_field.get() == ""):
        tkinter.messagebox.showinfo("Error !!", "Amount Not Entered.\n Please a valid amount.")

    elif (from_currency == "currency" or to_currency == "currency"):
        tkinter.messagebox.showinfo("Error !!",
                                    "Currency Not Selected.\n Please select FROM and TO Currency form menu.")

    else:
        new_amt = c.convert(from_currency, to_currency, float(Amount1_field.get()))
        new_amount = float("{:.4f}".format(new_amt))
        Amount2_field.insert(0, str(new_amount))


def clear_all():
    Amount1_field.delete(0, tk.END)
    Amount2_field.delete(0, tk.END)
4. UI For Python Currency Converter Project:
- For more currencies, you can add their abbreviations in this list.
- geometry() – By using the Geometry method, we can decide the size, position, and some other attributes of the screen layout we are going to create.
- bg – To change the background colour.
- fg – To change the foreground colour.
- The padx places a few area among the button widgets and between the closeButton and the right border of the root window.
- The pady places a few area among the button widgets and the borders of the frame and the borders of the root window.
- Created an “Amount: ” label and using grid_method for placing
- Created a “From Currency: ” label and using grid_method for placing
- Created a “To Currency: ” label and used grid_method for placing.
- Created a “Converted Currency: ” label and used grid_method for placing.
CurrenyCode_list = ["INR", "USD", "CAD", "CNY", "DKK", "EUR"]

root.configure(background='#e6e5e5')
root.geometry("700x400")

Label_1 = Label(root, font=('lato black', 27, 'bold'), text="", padx=2, pady=2, bg="#e6e5e5", fg="black")
Label_1.grid(row=1, column=0, sticky=W)

label1 = tk.Label(root, font=('lato black', 15, 'bold'), text="\t    Amount  :  ", bg="#e6e5e5", fg="black")
label1.grid(row=2, column=0, sticky=W)

label1 = tk.Label(root, font=('lato black', 15, 'bold'), text="\t    From Currency  :  ", bg="#e6e5e5", fg="black")
label1.grid(row=3, column=0, sticky=W)

label1 = tk.Label(root, font=('lato black', 15, 'bold'), text="\t    To Currency  :  ", bg="#e6e5e5", fg="black")
label1.grid(row=4, column=0, sticky=W)

label1 = tk.Label(root, font=('lato black', 15, 'bold'), text="\t    Converted Amount  :  ", bg="#e6e5e5", fg="black")
label1.grid(row=8, column=0, sticky=W)

Label_1 = Label(root, font=('lato black', 7, 'bold'), text="", padx=2, pady=2, bg="#e6e5e5", fg="black")
Label_1.grid(row=5, column=0, sticky=W)

Label_1 = Label(root, font=('lato black', 7, 'bold'), text="", padx=2, pady=2, bg="#e6e5e5", fg="black")
Label_1.grid(row=7, column=0, sticky=W)
5. Main Function:
- OptionMenu is used to represent some options available to the user and users can select the required option.
- The Entry widget provides a text box where users can enter any value or text.
- The Button widget is used to add buttons that will help to redirect to a function or method which was given.
- root. mainloop() is a method that is used to run the application.
FromCurrency_option = tk.OptionMenu(root, variable1, *CurrenyCode_list)
ToCurrency_option = tk.OptionMenu(root, variable2, *CurrenyCode_list)

FromCurrency_option.grid(row=3, column=0, ipadx=45, sticky=E)
ToCurrency_option.grid(row=4, column=0, ipadx=45, sticky=E)

Amount1_field = tk.Entry(root)
Amount1_field.grid(row=2, column=0, ipadx=28, sticky=E)

Amount2_field = tk.Entry(root)
Amount2_field.grid(row=8, column=0, ipadx=31, sticky=E)

Label_9 = Button(root, font=('arial', 15, 'bold'), text="   Convert  ", padx=2, pady=2, bg="light blue", fg="white",
                 command=RealTimeCurrencyConversion)
Label_9.grid(row=6, column=0)

Label_1 = Label(root, font=('lato black', 7, 'bold'), text="", padx=2, pady=2, bg="#e6e5e5", fg="black")
Label_1.grid(row=9, column=0, sticky=W)

Label_9 = Button(root, font=('arial', 15, 'bold'), text="   Clear All  ", padx=2, pady=2, bg="light blue", fg="white",
                 command=clear_all)
Label_9.grid(row=10, column=0)

root.mainloop()
Currency Converter Output
Summary
With this project in python, we have successfully developed and executed the Currency Converter Project. We used tkinter and forex_python modules to develop our project. Executing different functions and using many widgets and using loops helps us to develop our python programming skills.

Failed to resolve ‘theforexapi.com’