Create an Alarm Clock in Python using Tkinter
Get Job-ready with hands-on learning & real-time projects - Enroll Now!
Alarm clock helps to alert a person or a group of people at a specified time. It is primarily used to wake people from naps and also sometimes they are used as a reminder. In this project, we will be creating an alarm clock. Let’s start developing this amazing project.
About Alarm clock Project
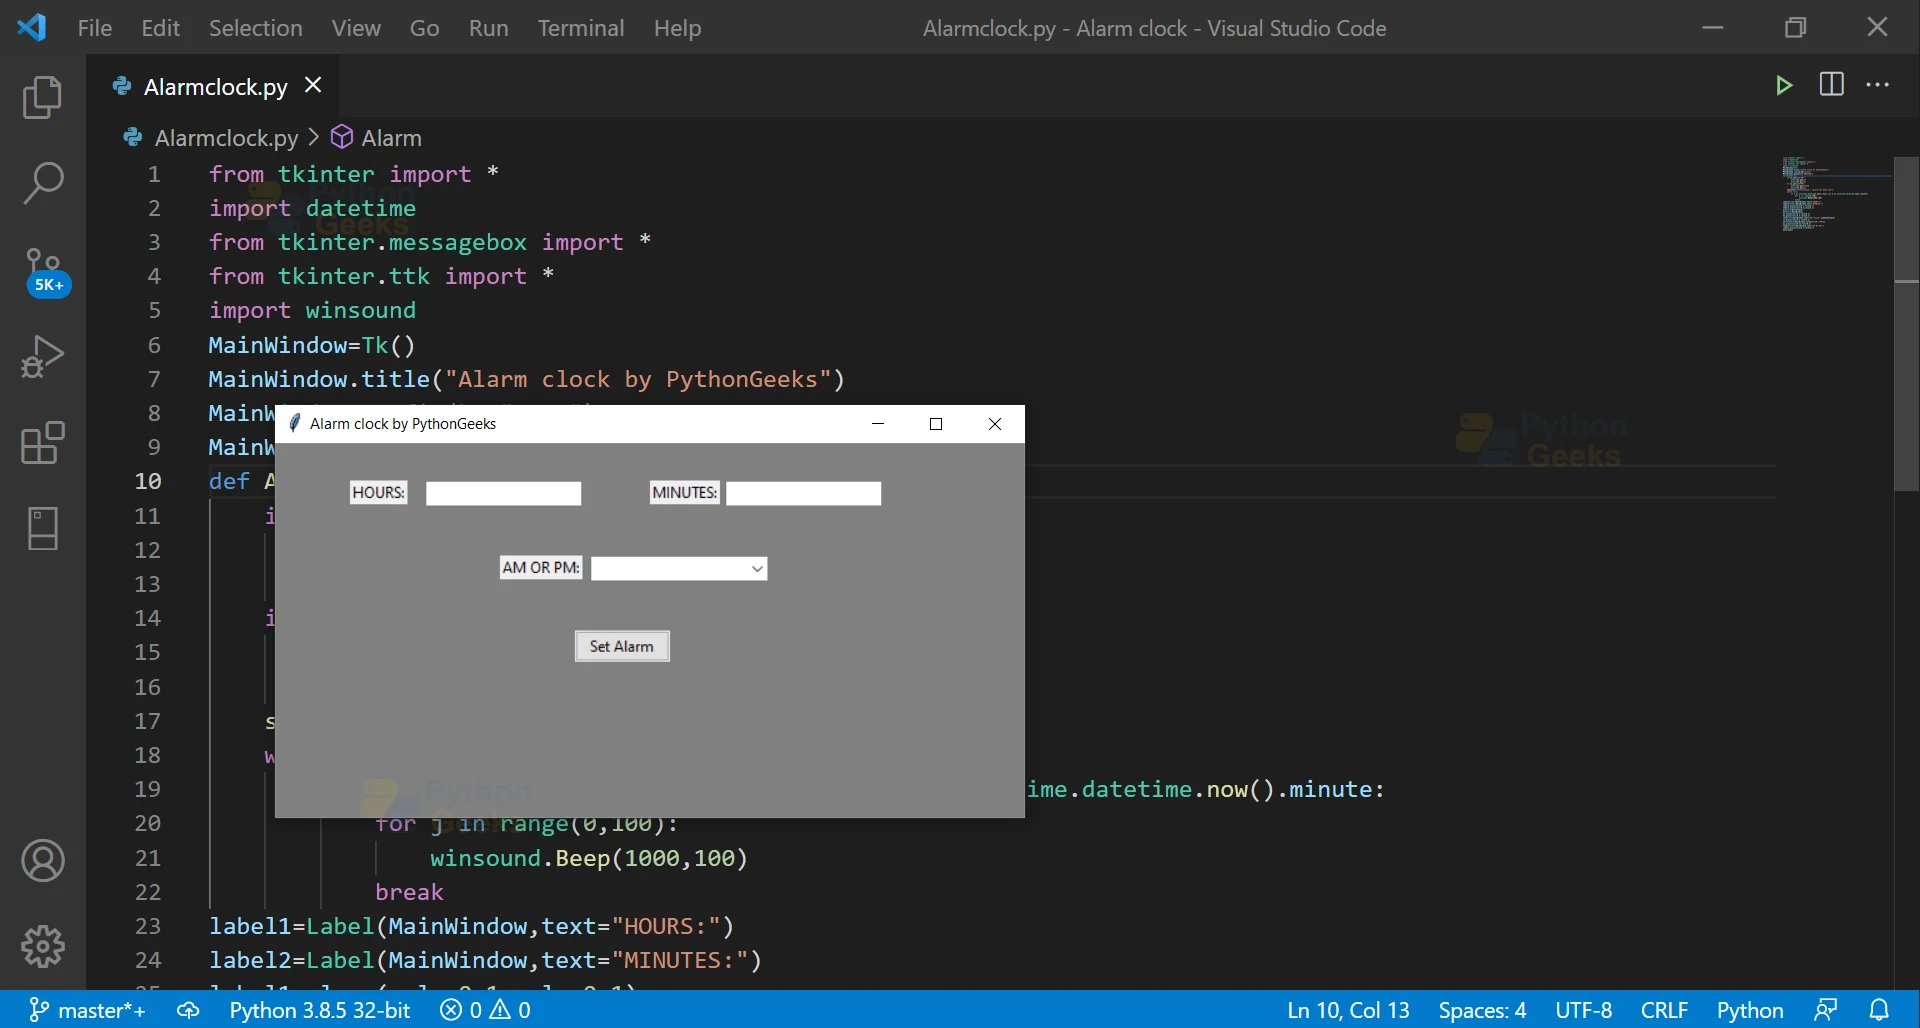
We will develop an alarm clock. The person has to enter the time in hours, minutes and also choose whether it is am or pm. After clicking on the set alarm, the alarm will be set.
Python Alarm clock Project
The objective of this project is to develop our own alarm clock. We need to install tkinter to start the project.
Project Prerequisites
Knowledge of tkinter and functions in python is needed to go ahead with the alarm clock project.
Download Alarm clock
Please download source code of python alarm clock from the following link: Alarm Clock Project Source Code
Project File Structure
1. Install tkinter
2. Importing libraries
3. Initializing Main Window
4. Defining function Alarm
5. Creating Labels and buttons
1. Install tkinter
Install tkinter before starting the project. Tkinter is built into the python standard library and it also provides the users easiest way to create graphical user interface applications. To install, write the command on your terminal window. Name the file according to your wish ex: AlarmClock.py.
pip install tkinter
2. Importing libraries
from tkinter import *
import datetime
from tkinter.messagebox import *
from tkinter.ttk import *
import winsound
Code Explanation:
a. datetime: Manipulation of date and time is done with this module.
b. Messagebox: Message Boxes are displayed in the python applications.
c. ttk: Tk themed widget set can be accessed with this module.
d. winsound: It provides access to the windows sound playing interface.
3.Initializing Main Window
MainWindow=Tk()
MainWindow.title("Alarm clock by PythonGeeks")
MainWindow.config(bg="grey")
MainWindow.geometry("600x300")
Code Explanation:
MainWindow is the root window.
a. title(): It displayed the title that is mentioned on the top of the tkinter window.
b. config(): In this code it is used to set the background color of the tkinter window as grey.
c. geometry(): It sets the length and width of the tkinter screen.
4. Defining function Alarm
def Alarm():
    if a1.get()=="AM":
        x=int(b1.get())
        y=int(b2.get())
    if a1.get()=="PM":
        x=int(b1.get())+12
        y=int(b2.get())
    showinfo("notification", "alarm has been set")
    while True:
        if x == datetime.datetime.now().hour and y == datetime.datetime.now().minute:
            for j in range(0,100):
                winsound.Beep(1000,100)
            break
Code Explanation:
a. get(): It gets the input that is entered by the user.
b. showinfo(): It displays a pop up on the screen with the text that is passed in the parentheses.
c. datetime.now(): It gets current date and time.
d. winsound.Beep(): It starts a beep sound.
5. Creating Labels and buttons
label1=Label(MainWindow,text="HOURS:")
label2=Label(MainWindow,text="MINUTES:")
label1.place(relx=0.1,rely=0.1)
label2.place(relx=0.5,rely=0.1)
b1=Entry(MainWindow)
b2=Entry(MainWindow)
b1.place(relx=0.2,rely=0.1)
b2.place(relx=0.6,rely=0.1)
c1=Button(MainWindow,text="Set Alarm",command=Alarm)
c1.place(relx=0.4,rely=0.5)
a1=Combobox(MainWindow,values=["AM","PM"])
a1.place(relx=0.42,rely=0.3)
label3=Label(MainWindow,text="AM OR PM:")
label3.place(relx=0.3,rely=0.3)
mainloop()
Code Explanation:
a. Label(): It displays a box where a person can enter the text.
b. Button(): Creation of buttons is done with this widget.
c. place(): It helps to give the starting point to a widget and it’s given according to coordinates on the cartesian plane.
d. relx: It is the horizontal distance as a fraction of height of the parent widget.
e. rely: It is the vertical distance as a fraction of height of the parent widget.
f. mainloop(): It runs the code.
Python Alarm Clock Output:
Summary:
We have successfully developed an alarm clock with the help of the tkinter module. We used various modules, created buttons, labels and a function to make this project.
