GUI Programming in Python
Get Ready for Your Dream Job: Click, Learn, Succeed, Start Now!
You would have used a lot of applications. One common thing you observe in all the applications is that they have multiple components like labels, fields to give inputs, buttons, etc. These are the elements that form the GUI (Graphical User Interface).
In this article, we will learn to make GUIs using Python. We will see different toolkits that Python provides for GUI programming. Then we will discuss the Tkinter, one of the most commonly used modules, in detail.
Let us start by seeing different modules Python offers.
Python Libraries for GUI Programming
We can use any of the following toolkits in Python for GUI programming.
1. Tkinter:
Tkinter is a standard package used for GUI programming in Python. This is built on top of the Tk interface.
2. PyQt:
PyQt is a Python toolkit binding of the Qt toolkit. Qt is a C++ framework that is used by Python to implement a cross-platform PyQt toolkit as a plug-in.
3. wxPython:
wxPython is also a cross-platform GUI toolkit. It is a wrapper for the API wxWidgets.
Python Tkinter Module
As said before we will concentrate on the Tkinter module.
Tkinter is a standard Python library used for GUI programming. It provides an object-oriented interface to build the Tk GUI toolkit. It is a faster and easier way to build a GUI in Python.
The creation of a blank GUI interface is the first step of the creation of any GUI. This process of creating a simple GUI in Tkinter requires the following steps:
1. Importing the Tkinter library:
We can import the Tkinter library by writing the below code.
import tkinter
2. Creating the main window for the application:
To create the main GUI window using the function Tk() function. The syntax of the Tk() function is:
Tk(screenName=None, baseName=None, className=’Tk’, useTk=1)
All the arguments are optional. We can change the name of the window by setting the className argument to your choice. This function returns the main window object which can be used in the next steps.
3. Adding the required widgets to the window:
Tinter provides 19 widgets. We will discuss each of these in the next section.
4. Calling the function mainloop():
This is the function that gets triggered when an event occurs. This is an infinite loop that runs till we close the application window.
Now let us see the code to build a simple GUI.
Example of creating a GUI window:
import tkinter

win=tkinter.Tk() #creating the main window and storing the window object in 'win'
#We create the widgets here
win.mainloop() #running the loop that works as a trigger
Output:
We can see a blank window as we did not add any widgets. Let us discuss the widgets in the next section. We can also set the size of the window by using the geometry() function. For example,
Example of creating a GUI window:
import tkinter

win=tkinter.Tk() #creating the main window and storing the window object in 'win'
win.geometry('500x200') #setting the size of the window
win.mainloop() #running the loop that works as a trigger
Output:
Tkinter Widgets
As said before we have 19 widgets in the Tkinter library which include text fields, labels, buttons, etc. Before discussing the widgets let us use functions offered by Tkinter to organize these widgets.
1. pack(): This method organizes widgets in blocks before positioning the parent widget
2. grid(): This method organizes widgets in the grid or table form before positioning the parent widget
3. place(): This method organizes the widgets by placing them in the position mentioned in the code.
Now let us see each of these widgets:
1. Button:
To add a button to the window, we use the Button() method. Its syntax is given below.
btn=Button(master, option=value)
The parent window is given as the master. Besides this, we have many other parameters that set the features of the button. These include:
a. activebackground: This parameter sets the background color when the cursor is on the button
b. activeforeground: This parameter sets the foreground color when the cursor is on the button
c. bg: We give the background color of the button to the parameter
d. command: We give a function to this parameter. This function contains the code to set the functionality of the button.
e. font: This parameter sets the font style of the label of the button
f. image: This parameter sets the background of the button to the image given
g. width: This sets the width of the button to the given value
h. height: This sets the height of the button to the given value
Now let us see an example of creating a button.
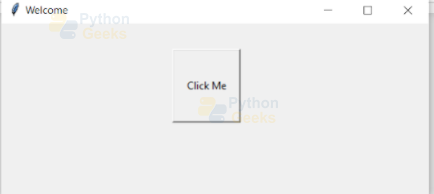
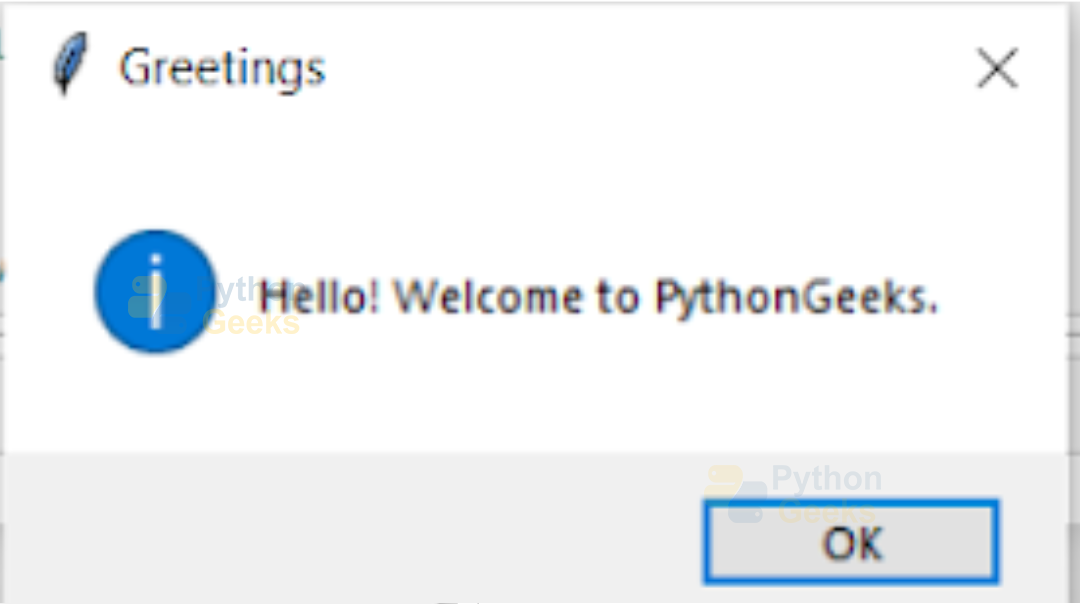
Example of the button
import tkinter.messagebox
from tkinter import *

win=Tk() #creating the main window and storing the window object in 'win'
win.title('Welcome') #setting title of the window
win.geometry('500x200') #setting the size of the window

def func():#function of the button
    tkinter.messagebox.showinfo("Greetings","Hello! Welcome to PythonGeeks.")

btn=Button(win,text="Click Me", width=10,height=5,command=func)
btn.place(x=200,y=30)


win.mainloop() #running the loop that works as a trigger
Output:
2. Canvas:
This lets you draw shapes such as lines, polygons, etc., and other layouts like graphics, text, and widgets. Its syntax is given below.
can=Canvas(master, option=value)
The parent window is given as the parameter master. In addition, we have parameters like:
a. bd: This parameter sets the border width. The value should be given in pixels
b. bg: We give the background color of the canvas to this parameter
c. cursor: This sets the cursor used when the cursor is on the canvas
d. highlightcolor: This parameter sets the color of the focus highlight
e. width: This sets the width of the canvas to the given value
f. height: This sets the height of the canvas to the given value
Example of the canvas
import tkinter.messagebox
from tkinter import *

win=Tk() #creating the main window and storing the window object in 'win'
win.title('Welcome') #setting title of the window


can=Canvas(win, width=500, height=300) #creating the canvas
oval=can.create_oval(100, 100, 200, 180,fill='green') #drawing an oval
can.pack()

win.mainloop() #running the loop that works as a trigger
Output:

3. CheckButton:
This widget lets the display multiple options for the user to select. The user can select any number of checkboxes. Its syntax is:
cb=CheckButton(master, option=value)
The parent window is given as the master. There are many other parameters related to the check button like:
a. activebackground: This parameter sets the background color when the cursor is on the check button
b. activeforeground: This parameter sets the foreground color when the cursor is on the check button
c. bg: We give the background color of the check button
d. command: This takes a function that contains the code to set the functionality of the check button.
e. font: This parameter sets the font style of the label of the button
f. image: This sets the input image on the check button
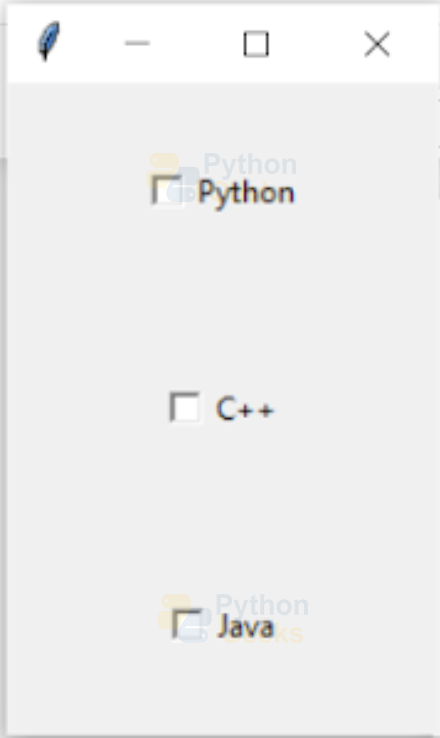
Example of the check button:
from tkinter import *

win=Tk() #creating the main window and storing the window object in 'win'
win.title('Welcome') #setting title of the window


cb_var1 = IntVar()
cb1=Checkbutton(win, text='Python', variable=cb_var1,onvalue=1,offvalue=0,height=5,width=20).grid(row=0, sticky=W)


cb_var2 = IntVar()
cb2=Checkbutton(win, text='C++', variable=cb_var2,onvalue=1,offvalue=0,height=5,width=20).grid(row=1, sticky=W)

cb_var3 = IntVar()
cb3=Checkbutton(win, text='Java', variable=cb_var3,onvalue=1,offvalue=0,height=5,width=20).grid(row=2, sticky=W)

win.mainloop() #running the loop that works as a trigger
Output:
4. Entry:
This widget allows you to take single-line input from the user. Its syntax is:
ent=Entry(master, option=value)
The parent window is given as the master. Besides, it has many other parameters like:
a. bd: This parameter sets the border width in pixels
b. bg: We can set the background color of the entry using this parameter
c. cursor: This sets the cursor used when the cursor is on the entry
d. command: This takes a function as an argument that gets called.
e. highlightcolor: This parameter sets the color of the focus highlight
f. width: This sets the width of the entry to the given value
g. height: This sets the height of the entry to the given value
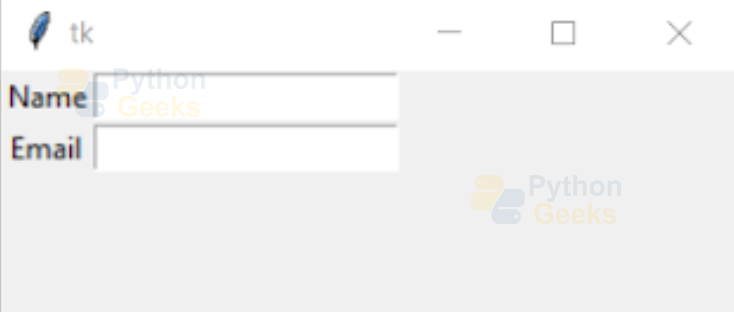
Example of the entry:
from tkinter import *

win=Tk() #creating the main window and storing the window object in 'win'
win.geometry('300x100') #setting the size of the window


Label(win, text='Name').grid(row=0)

Label(win, text='Email').grid(row=1)

ent1 = Entry(win)

ent2 = Entry(win)

ent1.grid(row=0, column=1)

ent2.grid(row=1, column=1)
mainloop()
Output:
5. Frame:
This widget acts as a container of other widgets. This is used to organize and position the widgets. Its syntax is:
frame=Frame(master, option=value)
The parent window is given as the ‘master’ parameter. There are other parameters like:
a. bd: This parameter sets the border width in pixels
b. bg: We can set the background color of the frame using this parameter
c. cursor: This sets the cursor used when the cursor is on the frame
d. highlightcolor: This parameter sets the color of the focus highlight
e. width: This sets the width of the frame
f. height: This sets the height of the frame
Example of the frame:
from tkinter import *

win=Tk() #creating the main window and storing the window object in 'win'
win.title('Welcome') #setting title of the window
win.geometry('250x50')

frame = Frame(win)
frame.pack()

second_frame = Frame(win)

second_frame.pack( side = BOTTOM )


red_button = Button(frame, text = 'Hello', bg ='red',fg='white')

red_button.pack( side = LEFT)


green_button = Button(frame, text = 'Hi', fg='white',bg='green')

green_button.pack( side = LEFT )


blue_button = Button(second_frame, text ='Blue', fg ='white',bg='blue')

blue_button.pack( side = LEFT )

win.mainloop() #running the loop that works as a trigger
Output:

6. Label:
This widget lets us display a text or an image. Its syntax is:
lab=Label(master, option=value)
The parent window is given as the ‘master’ parameter. There are other parameters like:
a. bd: This parameter sets the border width in pixels
b. bg: We can set the background color of the label using this parameter
c. command: This takes a function that contains the code to set the functionality of the label.
d. font: This parameter sets the font style of the text in the label
e. image: This parameter sets the image to display
f. width: This sets the width of the label
g. height: This sets the height of the label
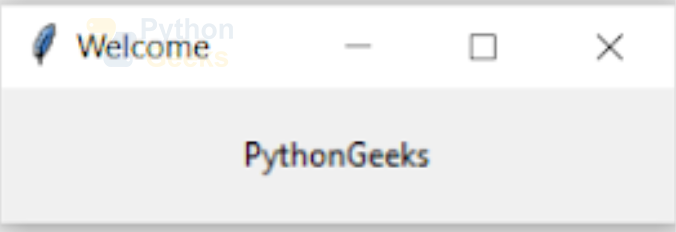
Example of the label:
from tkinter import *

win=Tk() #creating the main window and storing the window object in 'win'
win.title('Welcome') #setting title of the window
win.geometry('250x50')

lab=Label(win,text='PythonGeeks',width=50,height=30)
lab.pack()
win.mainloop() #running the loop that works as a trigger
Output:
7. Listbox:
This widget lets us give a list of items to the user to choose from. Its syntax is:
lb=Listbox(master, option=value)
The parent window is given as the ‘master’ parameter. There are other parameters like:
a. bd: This parameter sets the border width in pixels
b. bg: We can set the background color of the Listbox using this parameter
c. font: This parameter sets the font style of the text of items in the Listbox
d. highlightcolor: This parameter sets the color of the focus highlight
e. image: This parameter sets the background image of the Listbox
f. width: This sets the width of the listbox
g. height: This sets the height of the Listbox
We can use the insert() function to add elements to the Listbox. For example,
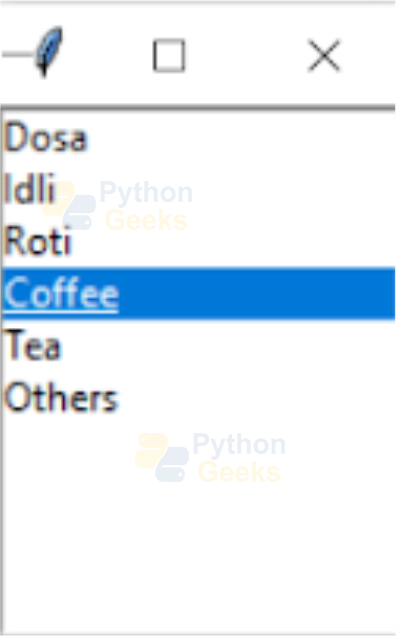
Example of the Listbox:
from tkinter import *

win=Tk() #creating the main window and storing the window object in 'win'
win.title('Welcome') #setting title of the window

lb = Listbox(win)
lb.insert(1, 'Dosa')
lb.insert(2, 'Idli')
lb.insert(3, 'Roti')
lb.insert(4,'Coffee')
lb.insert(5,'Tea')
lb.insert(6, 'Others')
lb.pack()

win.mainloop() #running the loop that works as a trigger
Output:
8. MenuButton:
This lets us add menus to the GUI. We can add a function to the menu button to open the menu options. Its syntax is:
mb=MenuButton(master, option=value)
The parent window is given as the ‘master’ parameter. Other parameters include:
A. activebackground: This parameter sets the background color when the cursor is on the menu button
B. activeforeground: This parameter sets the foreground color when the cursor is on the menu button
C. bd: This parameter sets the border width in pixels
D. bg: We can set the background color of the menu button using this parameter
E. cursor: This sets the cursor used in the menu button
F. highlightcolor: This parameter sets the color of the focus highlight
G. image: This parameter sets the background image of the menu button
H. width: This sets the width of the menu button
I. height: This sets the height of the menu button
Let us see an example.
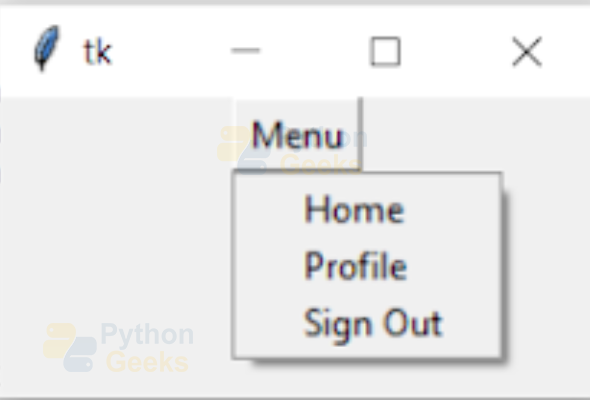
Example of the menu button:
from tkinter import *

win=Tk() #creating the main window and storing the window object in 'win'
win.geometry('200x100')
mb =  Menubutton ( win, text = 'Menu')
mb.grid()
mb.menu  =  Menu ( mb, tearoff = 0 )
mb['menu']  =  mb.menu

var1 = IntVar()
var2 = IntVar()
var3 = IntVar()

mb.menu.add_checkbutton ( label ='Home', variable = var1 )
mb.menu.add_checkbutton ( label = 'Profile', variable = var2 )
mb.menu.add_checkbutton ( label = 'Sign Out', variable = var3 )
mb.pack()


win.mainloop() #running the loop that works as a trigger
Output:
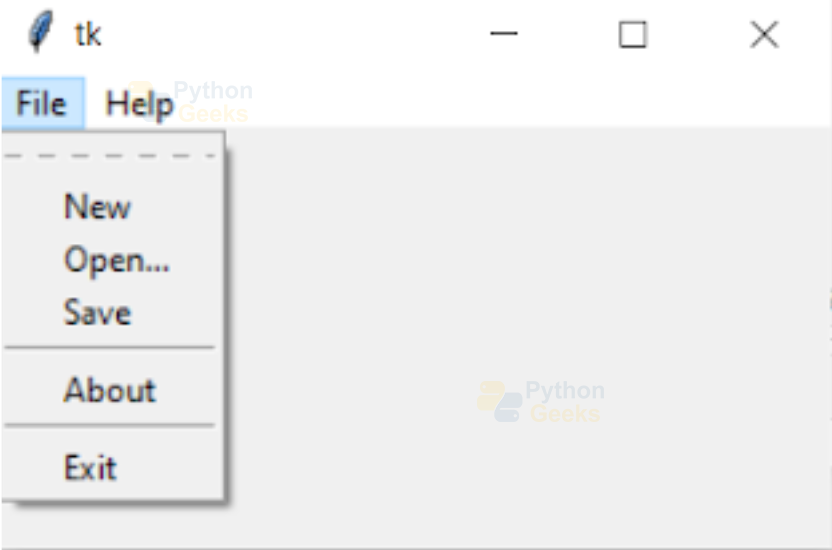
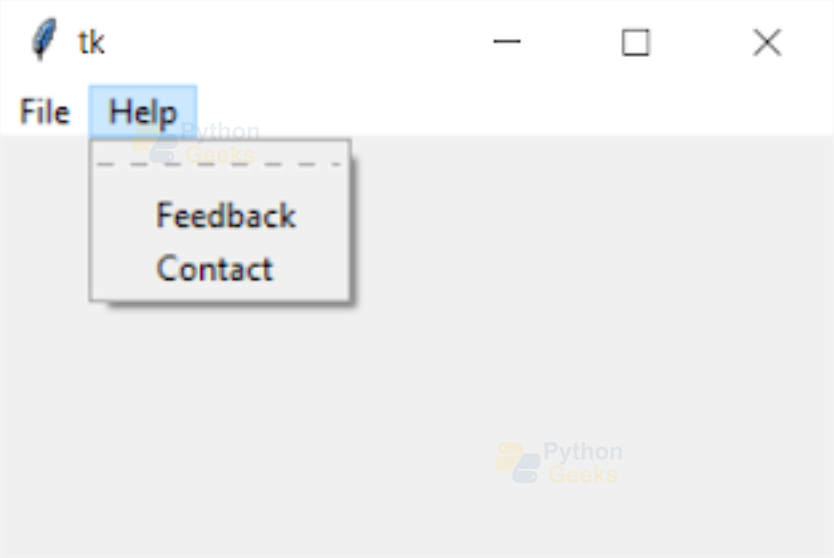
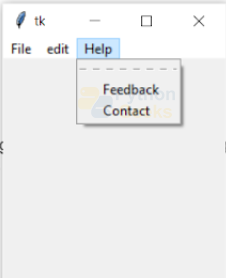
9. Menu:
This widget allows us to create all kinds of menus in the application. Its syntax is:
mn=Menu(master, option=value)
The parent window is given as the ‘master’ parameter. In addition, we can set other parameters like:
A. activebackground: This parameter sets the background color when the cursor is on the menu
B. activeforeground: This parameter sets the foreground color when the cursor is on the menu
C. bg: We can set the background color of the menu using this parameter
D. command: This takes a function that contains the code to set the functionality of the menu
E. font: This parameter sets the font style of the text of items in the menu
F. image: This parameter sets the background image of the menu
G. title: This sets the title of the menu
Let us see an example.
Example of the menu:
from tkinter import *

win=Tk() #creating the main window and storing the window object in 'win'
win.geometry('300x150')

mn = Menu(win)
win.config(menu=mn)

file_menu = Menu(mn)
mn.add_cascade(label='File', menu=file_menu)
file_menu.add_command(label='New')
file_menu.add_command(label='Open...')
file_menu.add_command(label='Save')
file_menu.add_separator()
file_menu.add_command(label='About')
file_menu.add_separator()
file_menu.add_command(label='Exit', command=win.quit)

help_menu = Menu(mn)
mn.add_cascade(label='Help', menu=help_menu)
help_menu.add_command(label='Feedback')
help_menu.add_command(label='Contact')

win.mainloop() #running the loop that works as a trigger
Output:
10. Message:
This widget is similar to a label. Here we can display multiline and non-editable text. Its syntax is:
msg=Message(master, option=value)
The parent window is given as the ‘master’ parameter. The other parameters that let us set other features are:
A. bd: This sets the border around the message widget
B. bg: We can set the background color of the message using this parameter
C. font: This parameter sets the font style in the message
D. image: This parameter sets the background image of the message widget
E. width: This sets the width of the message
F. height: This sets the height of the message
Let us see an example.
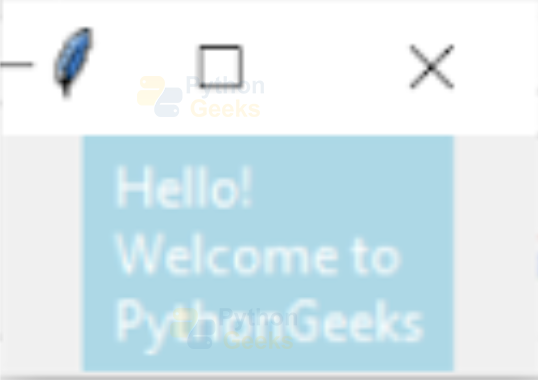
from tkinter import *

win=Tk() #creating the main window and storing the window object in 'win'

message ='Hello! Welcome to PythonGeeks'

msg = Message(win, text = message)
msg.config(bg='lightblue',fg='white')
msg.pack( )

win.mainloop() #running the loop that works as a trigger
Output:
11.Radiobutton:
This widget lets us give multiple options to the user and he/she can choose one of the options. Its syntax is:
rb=Radiobutton(master, option=value)
The parent window is given as the ‘master’ parameter. The other parameters that let us set other features are:
A. activebackground: This parameter sets the background color when the cursor is on the radio button
B. activeforeground: This parameter sets the foreground color when the cursor is on the radio button
C. bg: We can set the background color of the radio button using this parameter
D. command: This takes a function that contains the code to set the functionality of the radio button.
E. font: This parameter sets the font style if the items in the radio button
F. image: This parameter sets the background image of the radio button widget
G. width: This sets the width of the radio button
H. height: This sets the height of the radio button
Example of the radio button:
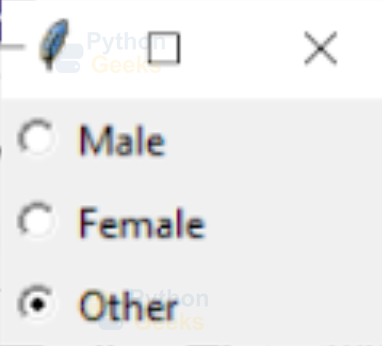
from tkinter import *

win=Tk() #creating the main window and storing the window object in 'win'

var = IntVar()

Radiobutton(win, text='Male', variable=var, value=1).pack(anchor=W)
Radiobutton(win, text='Female', variable=var, value=2).pack(anchor=W)
Radiobutton(win, text='Other', variable=var, value=3).pack(anchor=W)

win.mainloop() #running the loop that works as a trigger
Output:
12. Scale:
This provides a slider that allows the user to slide any value. Its syntax is:
sc=Scale(master, option=value)
The parent window is given as the ‘master’ parameter. The other parameters that let us set other features are:
A. activebackground: This parameter sets the background color when the cursor is on the scale
B. bg: We can set the background color of the scale using this parameter
C. cursor: This sets the cursor used in the scale
D. from_: This sets the value of one end of the scale
E. image: This parameter sets the background image of the scale
F. orient: Set the orientation of the widget to either HORIZONTAL or VERTICAL. By default, it is vertical.
G. to: It sets the value of the other end of the scale.
H. width: This sets the width of the scale
Example of the scale:
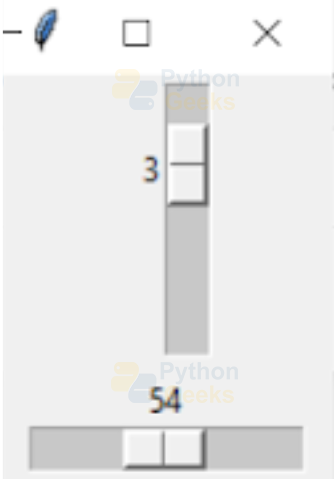
from tkinter import *

win=Tk() #creating the main window and storing the window object in 'win'

sc1= Scale(win, from_=0, to=15)
sc1.pack()

sc2 = Scale(win, from_=10, to=100, orient=HORIZONTAL)
sc2.pack()

win.mainloop() #running the loop that works as a trigger
Output:
13. Scrollbar:
This widget gives the scrolling feature to the other widgets like lists. Its syntax is:
sb=Scrollbar(master, option=value)
The parent window is given as the ‘master’ parameter. The other parameters that let us set other features are:
A. activebackground: This parameter sets the background color when the cursor is on the scrollbar
B. bd: This parameter sets the border around the scrollbar
C. bg: We can set the background color of the scrollbar
D. cursor: This sets the cursor used when the cursor is on the scrollbar
E. width: This sets the width of the scrollbar
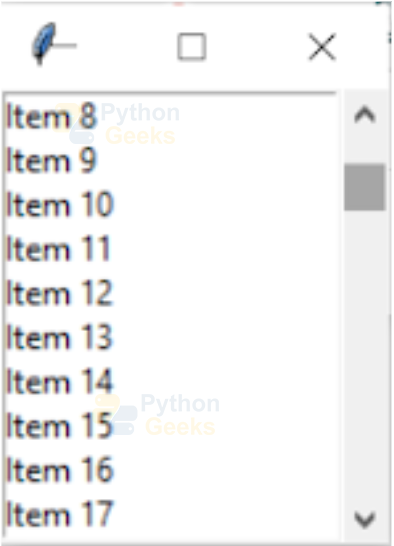
Example of the scrollbar:
from tkinter import *

win=Tk() #creating the main window and storing the window object in 'win'

sb = Scrollbar(win)
sb.pack( side = RIGHT, fill = Y )

list_1 = Listbox(win, yscrollcommand = sb.set )

for i in range(100):
    list_1.insert(END, 'Item ' + str(i))

list_1.pack( side = LEFT, fill = BOTH )
sb.config( command = list_1.yview )

win.mainloop() #running the loop that works as a trigger
Output:
14. Text:
This is a widget that can be used to display multiline text. Its syntax is:
txt=Text(master, option=value)
The parent window is given as the ‘master’ parameter. The other parameters are:
A. insertbackground: This parameter sets the background color of text
B. bg: We can set the background color of the test
C. font: This sets the font style of the text in this widget
D. highlightcolor: This sets the highlight color when the cursor is on this widget
E. height: This sets the height of the widget
F. image: This sets the image on the text widget
G. width: This sets the width of the text
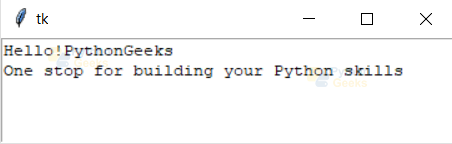
Example of the text:
from tkinter import *

win=Tk() #creating the main window and storing the window object in 'win'

txt= Text(win, height=5, width=45)
txt.pack()

txt.insert(INSERT,"Hello!")
txt.insert(END, 'PythonGeeks\nOne stop for building your Python skills\n')

win.mainloop() #running the loop that works as a trigger
Output:
15. TopLevel:
This widget provides a separate container window. This does not need a parent window. Its syntax is:
tl=TopLevel(master, option=value)
The parent window is given as the ‘master’ parameter. The other parameters that let us set other features are:
A. bd: This parameter sets the border around the top level
B. bg: We can set the background color of the top level
C. cursor: This sets the cursor used when the cursor is on the top level
D. height: This sets the height of the widget
E. width: This sets the width of the top level
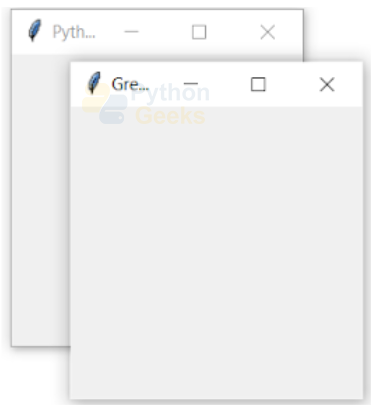
Example of the top level:
from tkinter import *

win=Tk() #creating the main window and storing the window object in 'win'
win.title('PythonGeeks')

tl= Toplevel()
tl.title('Greetings')

win.mainloop() #running the loop that works as a trigger
Output:
16. SpinBox:
This is similar to the entry widget. Here, instead of entering random input, the user is bound to enter any of the fixed numbers. Its syntax is:
sb=SpinBox(master, option=value)
The parent window is given as the ‘master’ parameter. The other parameters that let us set other features are:
A. activebackground: This parameter sets the background color when the cursor is on the SpinBox
B. bd: This parameter sets the border around the SpinBox
C. bg: We can set the background color of the SpinBox
D. command: This takes a function that contains the code to set the functionality of the SpinBox
E. cursor: This sets the cursor used when the cursor is on the SpinBox
F. from_: This sets the value of one end of the SpinBox
G. to: It sets the value of the other end of the SpinBox.
H. width: This sets the width of the SpinBox
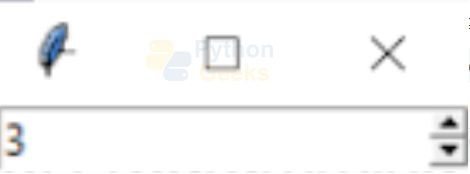
Example of the SpinBox:
from tkinter import *

win=Tk() #creating the main window and storing the window object in 'win'

sb = Spinbox(win, from_ = 1, to = 15)
sb.pack()

win.mainloop() #running the loop that works as a trigger
Output:
17. PannedWindow:
This is a widget that acts as a container of multiple panes oriented horizontally or vertically. Its syntax is:
pw=PannedWindow(master, option=value)
The parent window is given as the ‘master’ parameter. The other parameters that let us set other features are:
A. bd: This parameter sets the border around the PannedWindow
B. bg: We can set the background color of the PannedWindow
C. cursor: This sets the cursor used when the cursor is on the PannedWindow
D. width: This sets the width of the PannedWindow
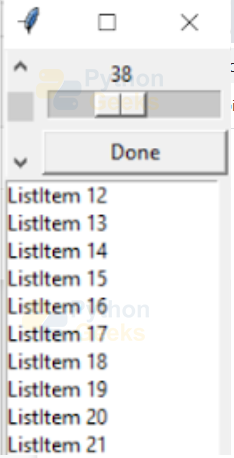
Example of the PannedWindow:
from tkinter import *

win=Tk() #creating the main window and storing the window object in 'win'

pw = PanedWindow()

pw.pack(fill = BOTH, expand = 1)

w1 = Scrollbar(win)
w1.pack( side = RIGHT, fill = Y )
list_1 = Listbox(win, yscrollcommand = w1.set )
for i in range(50):
    list_1.insert(END, 'ListItem ' + str(i))
list_1.pack( side = LEFT, fill = BOTH )
w1.config( command = list_1.yview )

pw.add(w1)

w2 = PanedWindow(pw, orient = VERTICAL)
pw.add(w2)

sc = Scale( w2, orient = HORIZONTAL)
w2.add(sc)

w3=Button(w2,text="Done")
w2.add(w3)

win.mainloop() #running the loop that works as a trigger
Output:
18. LabelFrame:
This widget acts as a container for complex window layouts. Its syntax is:
lf=LabelFrame(master, option=value)
The parent window is given as the ‘master’ parameter. The other parameters that let us set other features are:
A. bd: This parameter sets the border around the LabelFrame
B. bg: We can set the background color of the LabelFrame
C. cursor: This sets the cursor used when the cursor is on the LabelFrame
D. font: This sets the font style of the text in this widget
E. highlightbackground: This sets the highlight color when the widget is not in focus
F. highlightcolor: This sets the highlight color when the cursor is on this widget
G. height: This sets the height of the widget
H. labelAnchor: This is sed to specify where to place the label
I. text: This specifies the text to be displayed in the widget
J. width: This sets the width of the LabelFrame
Example of the LabelFrame:
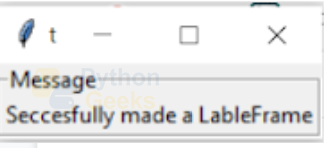
from tkinter import *

win=Tk() #creating the main window and storing the window object in 'win'

lf=LabelFrame(win,text="Message")
lf.pack(fill="both",expand="yes")
lb=Label(lf,text="Seccesfully made a LableFrame")
lb.pack()
win.mainloop()
Output:
19. tkMessageBox:
This widget is used to show pop-up messages. Remember we used this widget while discussing the button widget! The syntax of this widget is:
mb=tkMessageBox.FunctionName(title, message [, options])
In this, the function name can be any of the following functions:
A. askquestion()
B. askokcancel()
C. askyesno ()
D. askretrycancel ()
E. showerror ()
F. showinfo()
G. showwarning()
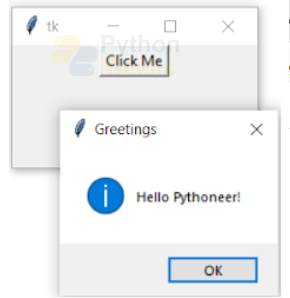
Example of messagebox:
from tkinter import *
from tkinter import messagebox

win=Tk() #creating the main window and storing the window object in 'win'
win.geometry("200x100")

def greet():
    messagebox.showinfo("Greetings", "Hello Pythoneer!")

btn = Button(win, text = "Click Me", command = greet)
btn.pack()

win.mainloop()
Output:
Interview Questions on GUI Programming in Python
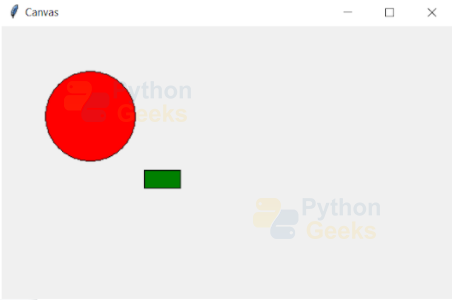
1. Write a program to draw a rectangle of green color and a circle of red color on the same GUI.
Ans. Below is the example of drawing shapes in tkinter:
import tkinter.messagebox
from tkinter import *

win=Tk()
win.title('Canvas')


can=Canvas(win, width=500, height=300)

oval=can.create_oval(50, 50, 150, 150,fill='red')


rect=can.create_rectangle(160, 160, 200, 180, fill="green")

can.pack()
win.mainloop()
Output:
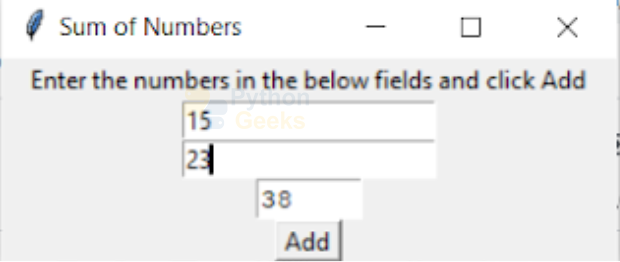
2. Write a program to add two numbers by taking these values as inputs and display the sum as the output.
Ans. Below is the example of GUI that displays the sum of two numbers:
from tkinter import *


def sum():
    a=int(ent1.get())
    b=int(ent2.get())
    s=a+b
    output.insert(1.0,str(s))

win=Tk() #creating the main window and storing the window object in 'win'
win.title('Sum of Numbers')
win.geometry('300x100') #setting the size of the window

text=Label(win, text='Enter the numbers in the below fields and click Add')
ent1 = Entry(win)


ent2 = Entry(win)


btn=Button(text='Add',command=sum)
output=Text(win,height=1,width=6)

text.pack()
ent1.pack()
ent2.pack()
output.pack()
btn.pack()
win.mainloop()
Output:
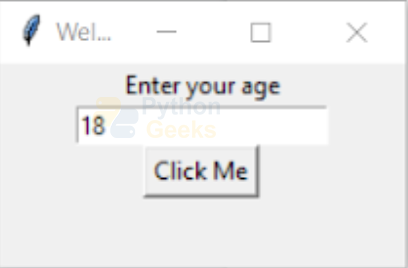
3. Write a program to take input of age and depending on the age output a pop-up message showing if the person is eligible to vote or not.
Ans. below is the example of GUI that checks the eligibility to vote:
import tkinter.messagebox
from tkinter import *
win=Tk() #creating the main window and storing the window object in 'win'
win.title('Welcome') #setting title of the window
win.geometry('200x100') #setting the size of the window
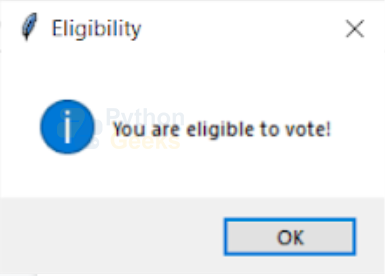
def vote():#function of the button
age=int(ent.get())
if(age<18):
msg='Sorry, you are not eligible to vote'
else:
msg='You are eligible to vote!'
tkinter.messagebox.showinfo('Eligibility',msg)
text=Label(win, text='Enter your age')
ent = Entry(win)
btn=Button(win,text="Click Me",command=vote)
text.pack()
ent.pack()
btn.pack()
win.mainloop() #running the loop that works as a trigger
Output:
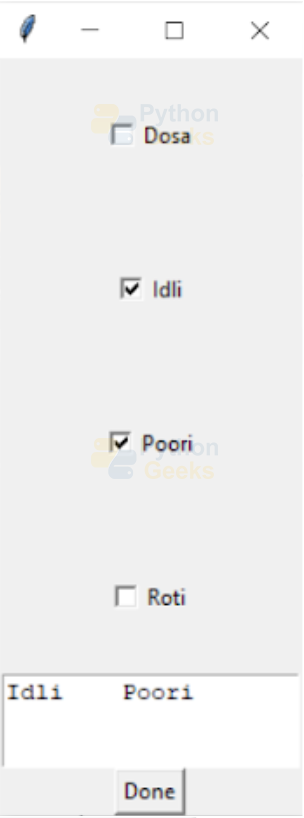
4. Write a program that contains different food items to choose from. Based on the choices, print all the names of the chosen items.
Ans. Below is the example of GUI with list of food items:
from tkinter import *

win=Tk() #creating the main window and storing the window object in 'win'
win.title('Menu') #setting title of the window

def check():
    string=''
    if(cb_var1.get()):
        string=string+'Dosa\t'
    if(cb_var2.get()):
        string=string+'Idli\t'
    if(cb_var3.get()):
        string=string+'Poori\t'
    if(cb_var4.get()):
        string=string+'Roti\t'
    txt.insert(1.0,string)


cb_var1 = IntVar()
cb1=Checkbutton(win, text='Dosa', variable=cb_var1,onvalue=1,offvalue=0,height=5,width=20)


cb_var2 = IntVar()
cb2=Checkbutton(win, text='Idli', variable=cb_var2,onvalue=1,offvalue=0,height=5,width=20)

cb_var3 = IntVar()
cb3=Checkbutton(win, text='Poori', variable=cb_var3,onvalue=1,offvalue=0,height=5,width=20)

cb_var4 = IntVar()
cb4=Checkbutton(win, text='Roti', variable=cb_var4,onvalue=1,offvalue=0,height=5,width=20)

txt=Text(win,height=3,width=20)
btn=Button(win,text="Done",command=check)

cb1.pack()
cb2.pack()
cb3.pack()
cb4.pack()
txt.pack()
btn.pack()


win.mainloop() #running the loop that works as a trigger
Output
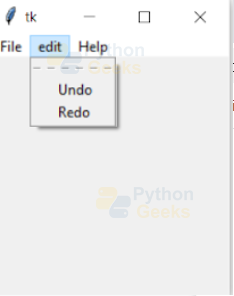
5. Write a program to create a menu with three options, namely, file, edit, and help. Let the file option have new, save and print. Let the edit have options to undo and redo. And give the options Terms and Services and Keyboard Shortcuts to help.
Ans. Below is the example of adding menu to GUI :
from tkinter import *

win=Tk() #creating the main window and storing the window object in 'win'
win.geometry('200x200')

mn = Menu(win)
win.config(menu=mn)

file_menu = Menu(mn)

mn.add_cascade(label='File', menu=file_menu)
file_menu.add_command(label='New')
file_menu.add_command(label='Save')
file_menu.add_command(label='Print')

edit_menu = Menu(mn)
mn.add_cascade(label='edit', menu=edit_menu)
edit_menu.add_command(label='Undo')
edit_menu.add_command(label='Redo')

help_menu = Menu(mn)
mn.add_cascade(label='Help', menu=help_menu)
help_menu.add_command(label='Feedback')
help_menu.add_command(label='Contact')

win.mainloop() #running the loop that works as a trigger
Output:

Quiz on GUI Programming in Python
Conclusion
Finally done with all the widgets of Python GUI Programming! We also saw some coding questions at the end. Hope you understood all the concepts discussed and built nice GUIs.
Happy learning!

Thank you for this tutorial! There is a simple non-production GUI driven tool I want to write and having all of this laid out completely and with examples will make it extremely straightforward.
Thank you again!
How do I save the GUI app and share it with people that don’t python? You know, like other app developers do?
Put the code in a plaintext editor (as Notepad) and save it as ‘myfile.py’
Then you can start it in the terminal window (shell) as ‘python myfile.py’
or just mouse double click on ‘myfile’ it in your file explorer.
You can share it with friends on condition they have installed python3
For no python installed, you should use pyqt instead of tkinter in order to conceive your GUI
Fortunately nowadays most of the operation systems come with python preinstalled.
it was really good to learn here. thank you, continue posting more.
thank you
Extremely good tutorial. Very well thought out and very thorough. Good progression through the widgets. Many thanks!
TK