Flask Installation in Easy Steps
Boost Your Career with In-demand Skills - Start Now!
A well-liked web framework for Python developers to create web apps is Flask. It provides a simple and lightweight approach to web development, making it a favorite among developers.
However, before you can start building Flask applications, you need to set up the Flask environment on your operating system. In this comprehensive guide, we will walk you through the step-by-step process of Flask Installation on Mac, Linux, and Windows.
Install Flask on Mac
Setting up Flask on a Mac is a relatively straightforward process. Here are the steps you need to follow:
Step 1: Install Python
Flask is built on top of Python, so you need to have Python installed on your Mac. If you don’t have Python installed, you can download latest version of Python. Follow the installation instructions to install Python on your Mac.
Step 2: Install Virtualenv
You can build isolated Python environments for your applications with the utility virtualenv. To establish a specific environment for your Flask project, virtualenv is advised. Run the following line in your terminal to install virtualenv:
pip install virtualenv
Step 3: Create a Virtual Environment
Once virtualenv is installed, you can create a virtual environment for your Flask project. Navigate to the directory where you want to create your project, and run the following command to create a virtual environment:
virtualenv pythongeeks-project
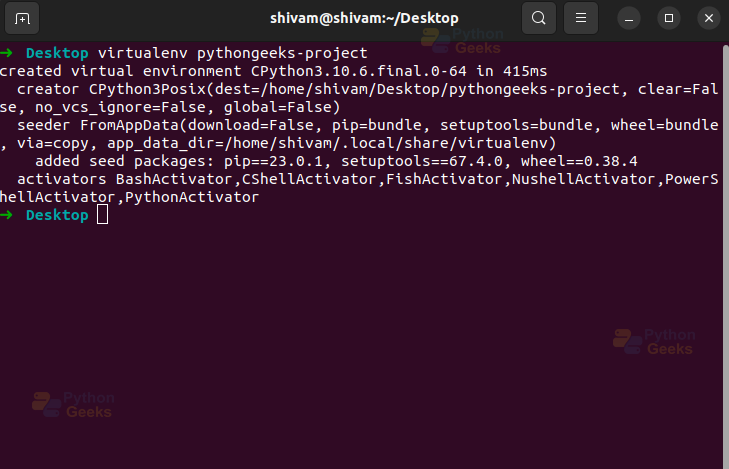
The name you want to give your virtual environment should be substituted for “pythongeeks-project”.
Step 4: Activate the Virtual Environment
You must activate the virtual environment after building it. Run the following command in your terminal to activate the virtual environment:
source pythongeeks-project/bin/activate
You will notice that the prompt in your terminal changes to indicate that you are now inside the virtual environment.
Step 5: Install Flask
With the virtual environment activated, you can now install Flask. Run the following command to install Flask using pip, the Python package manager:
pip install Flask

Step 6: Verify Flask Installation
Once Flask is installed, you can verify the installation by running the following command in your terminal:
python -c "print('hello')"
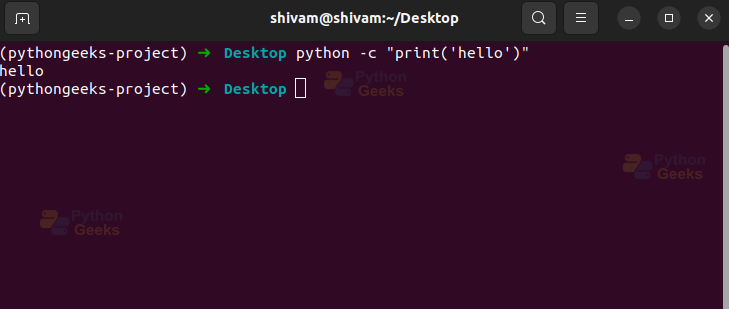
If you see the version number of Flask printed without any errors, it means that Flask is successfully installed in your virtual environment.
Flask Installation on Linux
Setting up Flask on a Linux machine is similar to setting it up on a Mac. Here are the steps you need to follow:
Step 1: Install Python
If you don’t already have Python installed on your Linux machine, you can install it using the package manager for your Linux distribution. For example, on Ubuntu, you can run the following command to install Python:
sudo apt-get update
sudo apt-get install python3

Step 2: Install Virtualenv
Just like in the Mac setup, you need to install virtualenv on your Linux machine. Open your terminal and run the following command:
pip install virtualenv
Step 3: Create a Virtual Environment
After installing virtualenv, you can create a virtual environment for your Flask project. Run the following command after navigating to the directory where you wish to build your project:
virtualenv pythongeeks-project
The name you want to give your virtual environment should be substituted for “pythongeeks-project”.
Step 4: Activate the Virtual Environment
Activate the virtual environment by running the following command in your terminal:
source pythongeeks-project/bin/activate
The prompt in your terminal will change to indicate that you are now inside the virtual environment.
Step 5: Install Flask
With the virtual environment activated, you can now install Flask. To install Flask using pip, issue the following command:
pip install Flask
Step 6: Verify Flask Installation
Once Flask is installed, you can verify the installation by running the following command in your terminal:
python -c print(‘hello’)

If you see the version number of Flask printed without any errors, it means that Flask is successfully installed in your virtual environment.
Flask Environment Setup on Windows
Setting up Flask on a Windows machine requires a slightly different approach compared to Mac and Linux. The steps you must take are as follows:
Step 1: Install Python
You can download the latest version of Python for Windows. Run the installer and follow the installation instructions to install Python on your Windows machine.
Step 2: Install Virtualenv
Similar to the Mac and Linux setups, you need to install virtualenv on your Windows machine. Open your command prompt and run the following command:
pip install virtualenv
Step 3: Create a Virtual Environment
After installing virtualenv, you can create a virtual environment for your Flask project. Navigate to the directory where you want to create your project using the command prompt, and run the following command:
virtualenv pythongeeks-project
Replace “pythongeeks-project” with the name you want to give to your virtual environment.
Step 4: Activate the Virtual Environment
Activate the virtual environment by running the following command in your command prompt:
pythongeeks-project\Scripts\activate
Note: In Windows, the path separator is a backslash (“\”) instead of a forward slash (“/”) used in Mac and Linux.
The prompt in your command prompt will change to indicate that you are now inside the virtual environment.
Step 5: Install Flask
With the virtual environment activated, you can now install Flask. Run the following command to install Flask using pip:
pip install Flask
Step 6: Verify Flask Installation
Once Flask is installed, you can verify the installation by running the following command in your command prompt:
python -c "print(‘hello’)"

If you see the version number of Flask printed without any errors, it means that Flask is successfully installed in your virtual environment.
Conclusion
Setting up the Flask environment is a crucial step in getting started with Flask web development. Whether you are using Mac, Linux, or Windows, the process involves installing Python, virtualenv, creating a virtual environment, activating it, installing Flask using pip, and verifying the installation.
By following the step-by-step instructions provided in this comprehensive guide, you can easily set up the Flask environment on your operating system and start building web applications using Flask. Remember to always use virtual environments to isolate your Flask projects and manage dependencies effectively. Happy Flask coding!

je suis interessersur cette application
De conteúdo e também é de automação produzir conteúdo e pesquisar na Web