Affine Transformation in OpenCV
We offer you a brighter future with placement-ready courses - Start Now!!
In this article, we’ll be understanding the Affine transformations in OpenCV. Affine transformation in OpenCV is defined as the transformation which preserves collinearity, conserves the ratio of the distance between any two points, and the parallelism of the lines. Transformations such as translation, rotation, scaling, perspective shift, etc. all come under the category of Affine transformations as all the properties mentioned above remain the same for these transformations.
What is Affine Transformation in OpenCV?
Affine transformations can be defined as a linear mapping method that preserves collinearity, conserves the ratio of the distance between any two points, and the parallelism of the lines. The points, straight lines, and planes remain preserved after the affine transformation. Parallel lines will remain parallel even after the application of affine transformation. It is a transformation method used to fix geometric distortions and deformations. An affine transformation can be represented by a 2 X 3 matrix.
The following transformations come under Affine Transformation
1. Rotating an image using cv2.rotate
2. Scaling an image using cv2.resize
3. Translating an image using cv2.getPerspectiveTransform
4. Perspective Transformation using cv2.warpAffin
cv2.getAffineTransform method
The function computes an affine transform from three pairs of the corresponding points received. It calculates the 2×3 matrix of an affine transform.
Syntax
cv2.getPerspectiveTransform(src, dst)
Parameters
- src: Coordinates of triangular vertices in the source image.
- dst: Coordinates of the corresponding triangular vertices in the output image.
cv2.warpAffine method
Syntax
cv2.warpAffine(src, Mat, dsize, dst, flags, borderMode, borderValue)
Parameters
- src: Source image or input image
- dst: Output image that has the size and the same type as the source image
- Mat: The transformation matrix
- dsize: Output image size
- flags: Interpolation methods
- borderMode: The method for pixel interpolation
- borderValue: Value used for the constant border. By default, the borderValue parameter is set as 0.
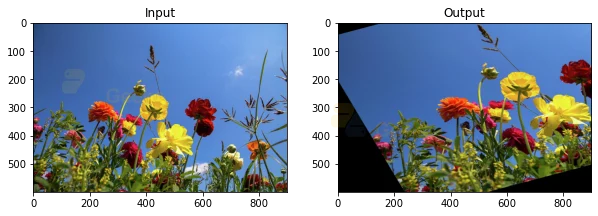
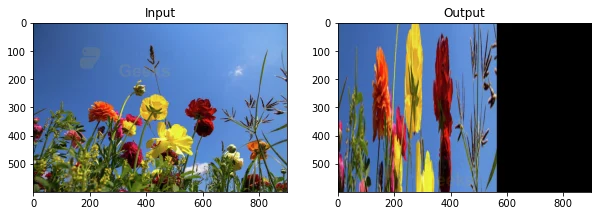
Implementation of opencv affine transformation
# Importing OpenCV
import cv2
# Importing numpy
import numpy as np
# Importing matplotlib.pyplot
import matplotlib.pyplot as plt
# Reading the image
img = cv2.imread(r"C:\Users\tushi\Downloads\PythonGeeks\flowers.jpg")
img = cv2.cvtColor(img, cv2.COLOR_BGR2RGB)
rows, cols, ch = img.shape

# Coordinates of triangular vertices in the source image
pt1 = np.float32([[50, 50],
                   [200, 50],
                   [50, 200]])
# Coordinates of the corresponding triangular vertices in the output image
pt2 = np.float32([[10, 100],
                   [200, 50],
                   [100, 250]])
# Creating a transformation matrix
Mat = cv2.getAffineTransform(pt1, pt2)
dst = cv2.warpAffine(img, Mat, (cols, rows))
plt.figure(figsize=(10,10))
# Plotting the input image
plt.subplot(121)
plt.imshow(img)
plt.title('Input')
# Plotting the output image
plt.subplot(122)
plt.imshow(dst)
plt.title('Output')

plt.show()
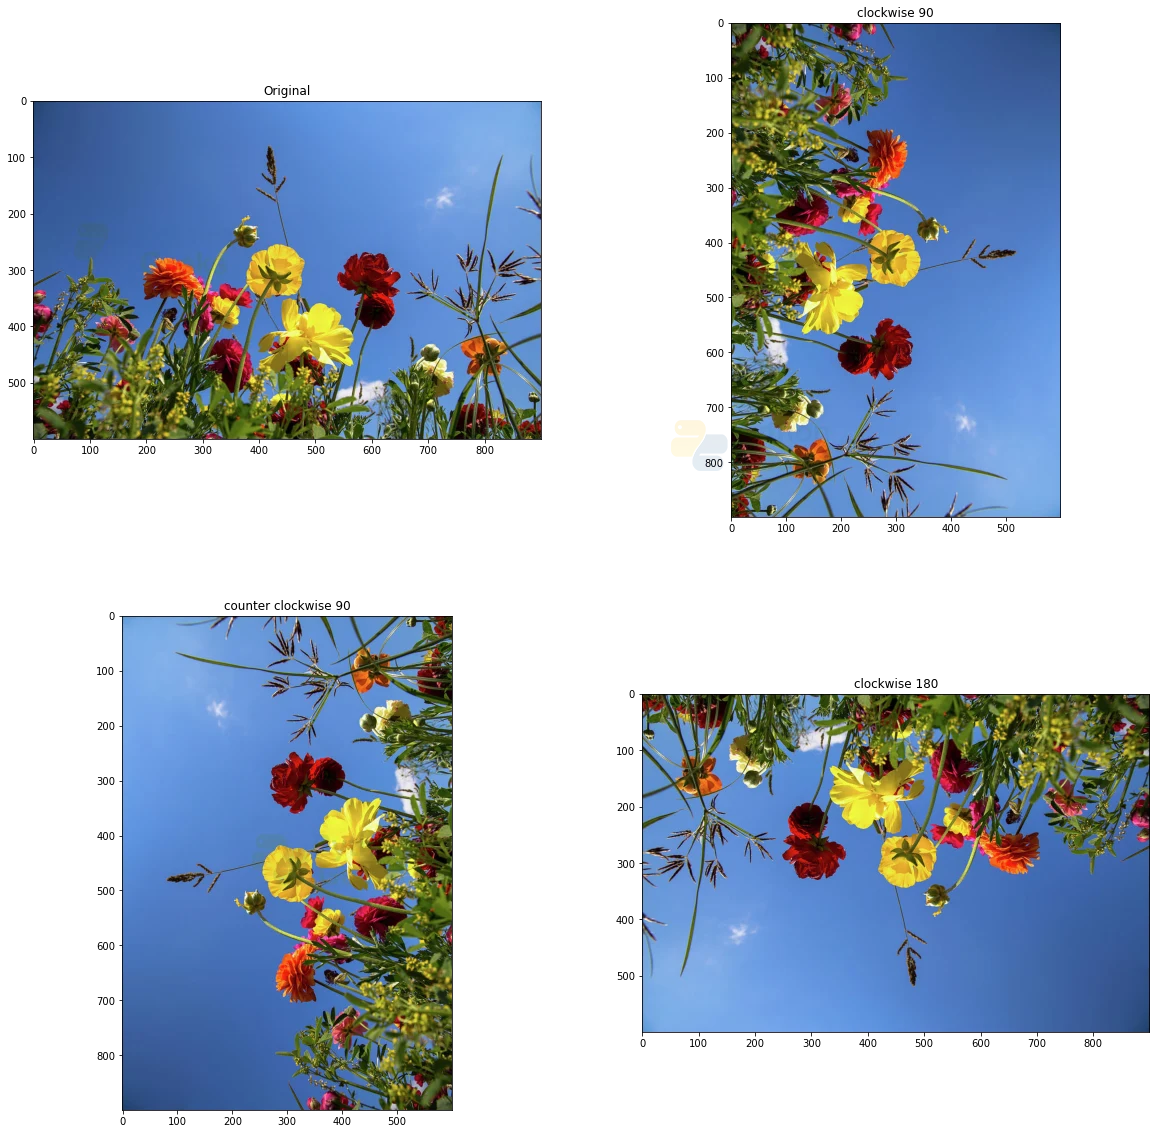
1. Rotating an image
Performing the rotation operation on an image refers to application of circular motion to that image. The objective of rotation is to rotate the image in the clockwise or anti-clockwise direction by a defined value, around a pivot point.
Rotation operation on an image can be obtained in OpenCV by the cv2.rotate function. This function is used to rotate an image in multiples of 90 degrees.
Syntax
cv2.rotate(src, rotateCode, dst)
Parameters
- src: Input image or source image to be rotated
- rotateCode: Specifies how to rotate the image
- dst: Output image of the same size and type as the input image
The rotateCode can take three values to specify the different criteria for the rotation of the image
1. rotateCode = ROTATE_90_CLOCKWISE. (rotates the image in the clockwise direction by 90 degrees)
2. rotateCode = ROTATE_180. (rotate the image in the clockwise direction by 180 degrees)
3. rotateCode = ROTATE_90_COUNTERCLOCKWISE. (rotate the image in the counterclockwise direction by 90 degrees or in the clockwise direction by 270 degrees)
Implementation
# Importing cv2
import cv2

# Importing matplotlib.pyplot
import matplotlib.pyplot as plt

# Reading images
img = cv2.imread(r'C:\Users\tushi\Downloads\PythonGeeks\flowers.jpg')
img = cv2.cvtColor(img, cv2.COLOR_BGR2RGB)

# Setting the grid size
plt.figure(figsize=(20,20))

# Displaying the original image
plt.subplot(221)
plt.title('Original')
plt.imshow(img)

# Rotating the image in clockwise direction by 90 degrees
rotated_image = cv2.rotate(img, cv2.cv2.ROTATE_90_CLOCKWISE)

# Displaying the rotated image
plt.subplot(222)
plt.title('clockwise 90')
plt.imshow(rotated_image)

# Rotating the image in counter clockwise direction by 90 degrees
rotated_image = cv2.rotate(img, cv2.cv2.ROTATE_90_COUNTERCLOCKWISE)

# Displaying the rotated image
plt.subplot(223)
plt.title('counter clockwise 90')
plt.imshow(rotated_image)

# Rotating the image by 180 degrees
rotated_image = cv2.rotate(img, cv2.ROTATE_180)

# Displaying the rotated image
plt.subplot(224)
plt.title('clockwise 180')
plt.imshow(rotated_image)
plt.show()
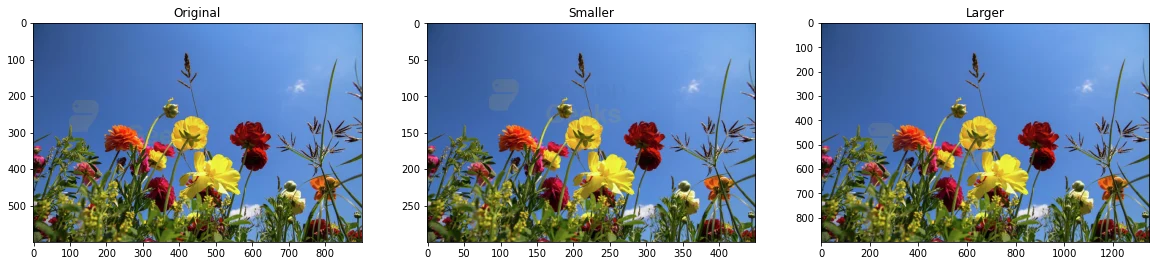
2. Scaling
Resizing refers to the scaling of an image. When the resizing of an image is done, the pixel information changes. Thus, resampling of the pixels is required while reducing the size of an image whereas reconstruction of the image is required while increasing the size of an image. Reconstruction means interpolation of new pixels. The scaling size for the image can be specified manually, or scaling factor can be used. Scaling of an image in OpenCV can also be achieved using different interpolation methods.
Syntax
cv2.resize(src, dsize, dst, fx, fy, interpolation)
Parameters
- src: It is the input image
- dst: It is the output image. It is the size of the input image.
- dsize: Output image size. It is calculated using
- dsize = Size(round(fx*src.cols), round(fy*src.rows))
- fx: Specifies the scaling factor along the horizontal axis
- fy: Specifies the scaling factor along the vertical axis
- interpolation: interpolation function used
1. cv2.INTER_AREA: Resamples using pixel area relation. It is usually used to shrink images.
2. cv2.INTER_CUBIC: It is the Bicubic interpolation method
3. cv2.INTER_LINEAR: This is used when zooming is required. It is the default interpolation function in OpenCV. It is the Bilinear interpolation method.
Implementation
# Importing cv2
import cv2

# Importing matplotlib.pyplot
import matplotlib.pyplot as plt

# Reading images
img = cv2.imread(r'C:\Users\tushi\Downloads\PythonGeeks\flowers.jpg')
img = cv2.cvtColor(img, cv2.COLOR_BGR2RGB)

# Setting the grid size
plt.figure(figsize=(20,20))

# Displaying the original image
plt.subplot(131)
plt.title('Original')
plt.imshow(img)

# The image is scaled to a smaller size of the original image
resized_image = cv2.resize(img, dsize=(0,0), fx=0.5, fy=0.5)

# Displaying the resized image
plt.subplot(132)
plt.title('Smaller')
plt.imshow(resized_image)

# The image is scaled to a larger size of the original image
resized_image = cv2.resize(img, dsize=(0,0), fx=1.5, fy=1.5)

# Displaying the resized image
plt.subplot(133)
plt.title('Larger')
plt.imshow(resized_image)
plt.show()
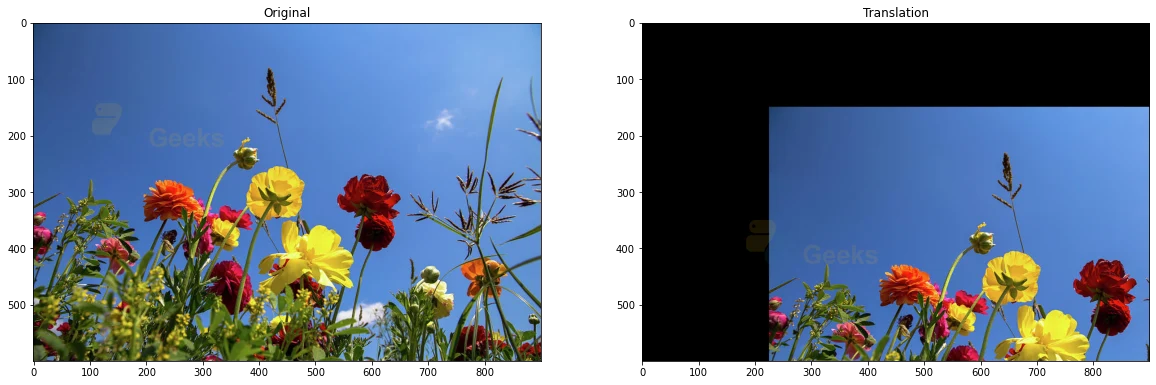
3. Translation
Translation operation in image processing refers to the rectilinear shift in the positioning of an image i.e. shifting the image from one position to another.
If the amount of horizontal shift and the vertical direction is known, then a transformation matrix can be computed.
In OpenCV, the cv2.wrapAffine() function is used to implement the translation of an image. The wrapAffine function requires a 2 X 3 array of float type.
Syntax
cv2.warpAffine(src, dst, Mat, dsize, flags, borderMode, borderValue)
Parameters
- src: Source image or input image
- dst: Output image that has the size and the same type as the source image
- Mat: The transformation matrix
- dsize: Output image size
- flags: Interpolation methods
- borderMode: The method for pixel interpolation
- borderValue: Value used for the constant border. By default, the borderValue parameter is set as 0.
Implementation
# Importing cv2
import cv2

# Importing matplotlib.pyplot
import matplotlib.pyplot as plt

# Reading images
img = cv2.imread(r'C:\Users\tushi\Downloads\PythonGeeks\flowers.jpg')
img = cv2.cvtColor(img, cv2.COLOR_BGR2RGB)

# Getting the height and width of the image
height, width = img.shape[:2]

# Defining the shifting coordinates
quarter_height, quarter_width = height/4, width/4
Coordinates = np.float32([[1, 0, quarter_width], [0, 1, quarter_height]])

# Creating the transformation matrix
img_translation = cv2.warpAffine(img, Coordinates, (width, height))

# Setting the grid size
plt.figure(figsize=(20,20))

# Plotting the original image
plt.subplot(121)
plt.title('Original')
plt.imshow(img)

# Plotting the translation image
plt.subplot(122)
plt.title('Translation')
plt.imshow(img_translation)
plt.show()
4. Perspective Transformation
Perspective transformation in OpenCV is the operation through which we can change the perspective of any image or video to gain better insights. The points on which we need to change the perspective need to be defined and given to the perspective transform function. The perspective transformation requires a 3 x 3 transformation matrix.
Then transformation matrix can be computed through the function cv2.getPerspectiveTransform. In OpenCV, the perspective transformation is carried through the cv.warpPerspective function
cv2.getPerspectiveTransform method
Syntax
cv2.getPerspectiveTransform(src, dst)
Parameters
- src: Coordinates of triangular vertices in the source image.
- dst: Coordinates of the corresponding triangular vertices in the output image.
cv2.wrapPerspective method
Syntax
cv2.warpPerspective(src, dst, Mat, dsize, flags, borderMode, borderValue)
Parameters
- src: Source image or input image
- dst: Output image that has the size and the same type as the source image
- Mat: The transformation matrix
- dsize: Output image size
- flags: Interpolation methods
- borderMode: The method for pixel interpolation
- borderValue: Value used for the constant border. By default, the borderValue parameter is set as 0.
Implementation
# Importing OpenCV
import cv2

# Importing numpy
import numpy as np

# Importing matplotlib.pyplot
import matplotlib.pyplot as plt

# Reading the image
img = cv2.imread(r"C:\Users\tushi\Downloads\PythonGeeks\flowers.jpg")
img = cv2.cvtColor(img, cv2.COLOR_BGR2RGB)
rows, cols, ch = img.shape

# Coordinates of vertices in the source image
pt1 = np.float32([[0, 260], [640, 260],
                 [0, 400], [640, 400]])

# Coordinates of the corresponding vertices in the output image
pt2 = np.float32([[0, 0], [400, 0],
                 [0, 640], [400, 640]])

# Creating a transformation matrix
Mat = cv2.getPerspectiveTransform(pt1, pt2)
dst = cv2.warpPerspective(img, Mat, (cols, rows))

plt.figure(figsize=(10,10))

# Plotting the input image
plt.subplot(121)
plt.imshow(img)
plt.title('Input')

# Plotting the output image
plt.subplot(122)
plt.imshow(dst)
plt.title('Output')

plt.show()
Conclusion
In this article, we discussed Affine transformations, which is the transformation that preserves collinearity, conserves the ratio of the distance between any two points, and the parallelism of the lines. We learned the various affine transformations like rotating an image, Scaling, and Perspective transformation. Furthermore, we also implemented all these operations in OpenCV.
